


Our Blogs
How to Winterize a 4 Stroke Outboard Motor Properly

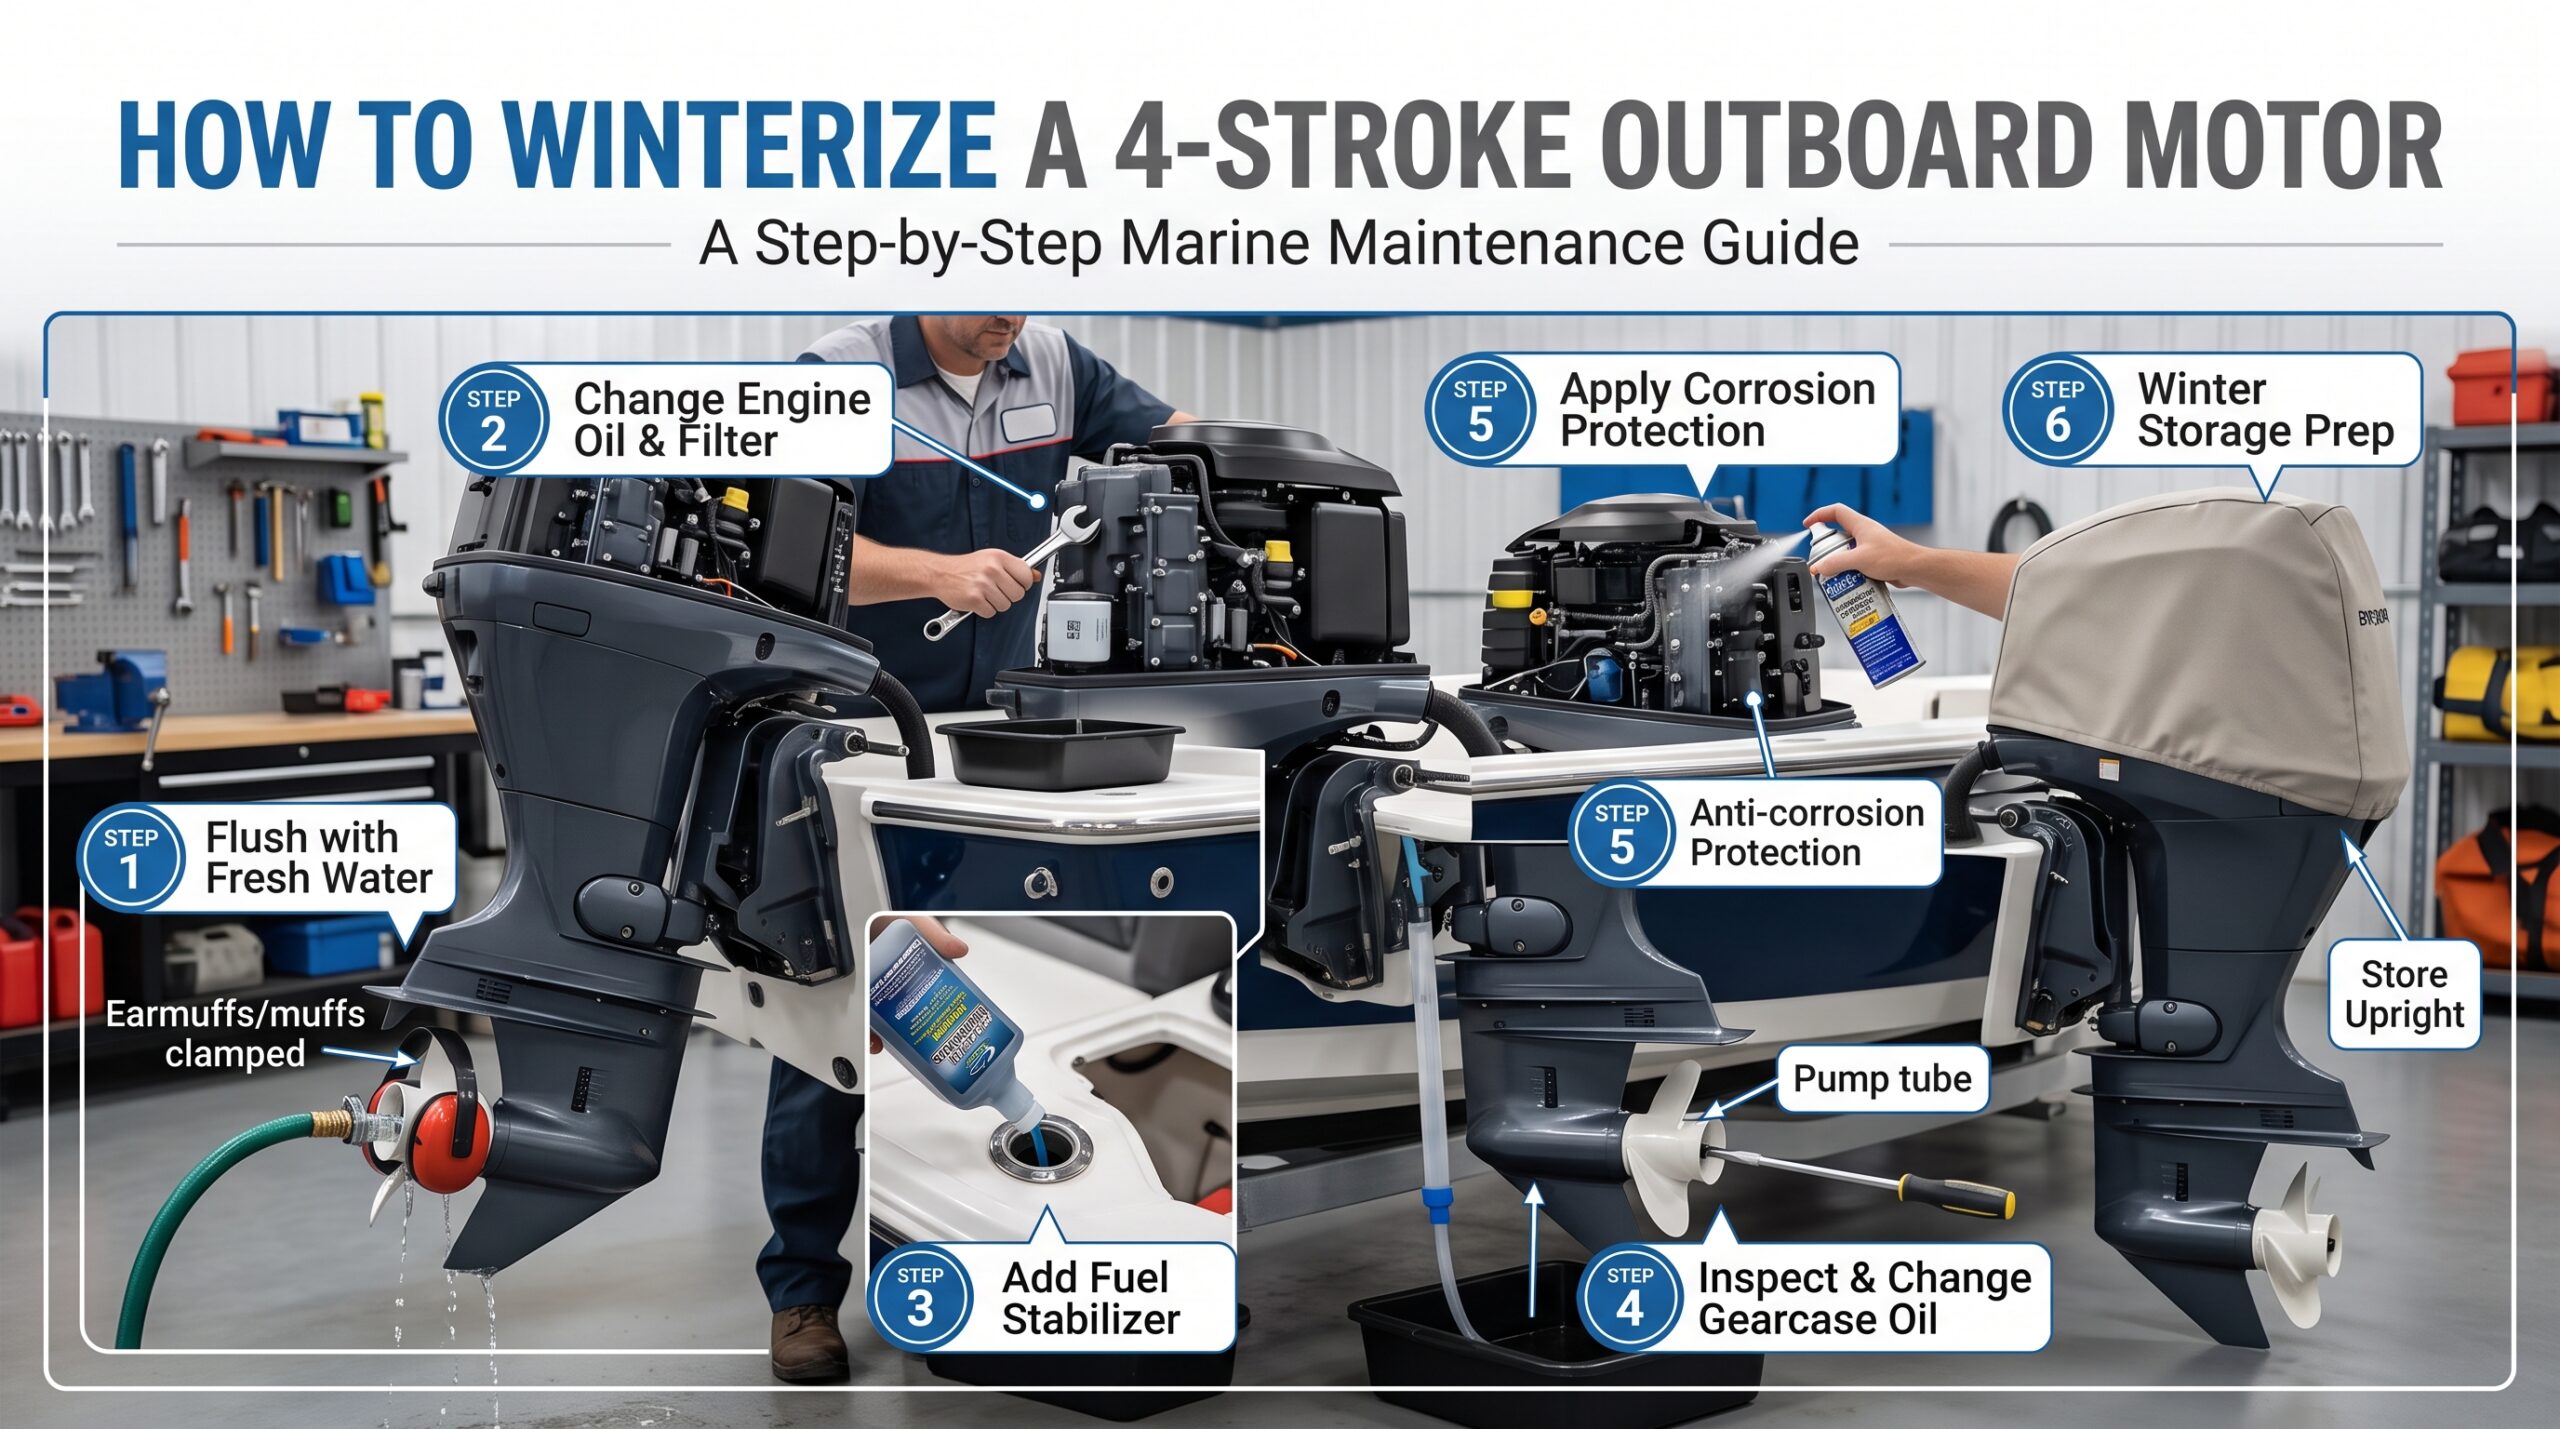
Preparing your boat engine for winter is an important part of regular maintenance. Cold weather, moisture, old fuel, and salt deposits can cause problems when an outboard motor sits unused for several months. A little care before storage can help protect engine parts and make spring startup easier.
If you want to learn how to winterize a 4-stroke outboard motor, start by checking your owner’s manual. Then flush the cooling system, change the engine oil and filter as recommended, inspect the gearcase lubricant, protect the fuel system, and prepare the motor for storage. You should also check the propeller, steering parts, electrical connections, and corrosion protection.
The exact process depends on your engine’s make, model, age, and fuel system. Some four-stroke engines need special storage steps, while others have specific instructions about fogging oil and fuel treatment. Always follow the manufacturer’s guidance rather than using the same method for every engine.
This guide explains each step in simple terms. Whether you own a small fishing boat motor or a larger marine engine, you will learn how to prepare it for cold weather and long periods of inactivity.
Why Should You Winterize a 4 Stroke Outboard Motor?
Winterization helps protect an outboard engine when you will not use it for an extended period. It is not only about cold temperatures. Fuel quality, moisture, corrosion, and neglected maintenance can also affect engine performance.
Learning how to winterize a 4 stroke outboard motor can help you identify problems before they become more expensive to repair.
Protect the Engine From Cold Weather Damage
Water left in parts of an engine or its cooling system may freeze in cold conditions. When water freezes, it expands. This can damage components if water is trapped in a vulnerable area.
Many outboards are designed to drain when tilted to the recommended storage position. However, you should never assume every part has drained completely.
Follow the owner’s manual for flushing, draining, and storage position. If your motor has special cooling-system procedures, complete them before temperatures fall below freezing.
Prevent Rust and Internal Corrosion
Moisture can cause corrosion on metal parts. This is especially important if you use your boat in saltwater.
Salt deposits can remain on the engine even after a normal trip. Over time, they can damage exposed metal surfaces and electrical connections.
Freshwater flushing, suitable corrosion protection, and dry storage help reduce these risks.
Keep the Fuel System Clean
Gasoline can deteriorate during storage. The problem may become more noticeable when fuel remains unused for several months.
Old fuel can cause starting trouble, rough running, and fuel-system deposits. Ethanol-blended gasoline may also attract moisture under certain conditions.
A suitable marine fuel stabilizer can help preserve fuel quality when used according to its label. It does not restore badly degraded gasoline or remove water that has already entered the system.
Extend the Life of Your Outboard Motor
Routine maintenance helps you find small problems before storing the engine.
For example, cloudy gearcase oil may indicate water contamination. A damaged propeller seal may allow water into the gearcase. A loose electrical connection may also cause trouble when you return to boating.
Winterization gives you a chance to inspect these parts and address problems before the next season.
Tools and Supplies Needed for Winterization
Gather the correct tools before you begin. Using the right supplies makes the job easier and reduces the risk of spills or incorrect installation.
The following items are common winterization supplies. Check your manual to confirm which ones your engine requires.
Engine Oil and Oil Filter
Use engine oil that meets the manufacturer’s viscosity and performance specifications.
Four-stroke outboards have an engine lubrication system that is separate from the gearcase. Many models also use a replaceable oil filter.
You may need:
-
The correct grade and quantity of marine engine oil
-
A compatible oil filter
-
An oil filter wrench, if required
-
An oil drain container
-
A funnel and clean rags
Do not select engine oil based only on its price or the fact that it is labeled for general automotive use. Confirm that it meets your engine’s requirements.
Marine Fuel Stabilizer
A marine fuel stabilizer is designed to help protect gasoline during storage.
Choose a product that is compatible with your fuel type and engine. Read the label for the correct amount, application method, and storage period.
Do not add extra stabilizer in the belief that more will provide better protection.
Fogging Oil, If Required by the Manufacturer
Fogging oil can provide a protective film on certain internal engine surfaces during storage.
However, not every four-stroke outboard should be fogged in the same way. Some engines have manufacturer-specific procedures, and some require a different method or no conventional fogging oil at all.
Using an unsuitable product or spraying it through the wrong opening can damage components or create operating problems.
Check your manual before using fogging oil.
Freshwater Flushing Equipment
You will need the flushing equipment specified for your engine.
Depending on the model, this may include:
-
A garden hose
-
Manufacturer-approved flushing attachments
-
A suitable water supply
-
A drain pan for collecting spills
Never run an outboard without the cooling-water supply required by its manufacturer.
Grease, Gearcase Oil, and Basic Tools
Other supplies may include:
-
Manufacturer-approved marine grease
-
Correct gearcase lubricant
-
New gearcase drain and vent screw sealing washers, if required
-
Screwdrivers and suitable wrenches
-
A propeller wrench
-
Safety gloves and eye protection
-
A battery charger designed for your battery type
Keep used oil and fuel out of drains, soil, and waterways. Collect them in suitable containers and take them to an approved disposal or recycling facility.
How to Winterize a 4 Stroke Outboard Motor Step by Step
The best way to prepare your engine for winter is to follow a clear maintenance routine. Work in a well-ventilated area, keep ignition sources away from fuel, and use the safety procedures in your owner’s manual.
Step 1: Check the Owner’s Manual
Before doing any maintenance, find the manual for your exact engine model.
Look for the recommended storage procedure, engine oil specifications, fuel requirements, gearcase lubricant, flushing instructions, and storage position.
Pay attention to any special instructions for electronic fuel injection, direct injection, or other engine systems.
If the manual says to use a specific tool or procedure, follow it. A method suitable for one four-stroke outboard may not be suitable for another.
Write down the maintenance tasks you need to complete. This will help you avoid missing an important step.
Step 2: Flush the Engine With Fresh Water
Flushing removes salt, dirt, and other deposits from the cooling passages.
This step is especially important if you operate your boat in saltwater or brackish water.
Follow these basic guidelines:
-
Place the motor in the position required by the manufacturer for flushing.
-
Connect the approved flushing attachment or hose.
-
Turn on the water supply as directed.
-
Allow the water to flow for the specified period.
-
Shut off the water and disconnect the equipment as instructed.
Some outboards can be flushed using a dedicated flushing port without running the engine. Others require a different procedure.
Never assume that all engines can be flushed while running. Never run an engine dry, and do not start it on flushing muffs unless the manufacturer permits that method and the water supply is correct.
After flushing, allow the engine to drain according to the manual.
Step 3: Warm Up the Engine Safely
Some maintenance procedures are easier when the engine oil is warm. Warm oil generally flows more easily than cold oil.
If your manufacturer’s procedure calls for warming the engine, do so before changing the oil.
Make sure the engine has the correct cooling-water supply. Keep the propeller area clear, and never operate the motor in an enclosed space because exhaust gases can be deadly.
Do not run the engine if you notice an overheating warning, an abnormal noise, a fuel leak, or another serious problem.
If the manual permits warming the engine during flushing, follow its exact instructions. Otherwise, use the approved method for preparing the engine for service.
Step 4: Change the Engine Oil and Oil Filter
Changing the engine oil is an important part of seasonal maintenance.
Used oil can contain contaminants from normal engine operation. Leaving it in the engine for a long storage period may be undesirable, so many manufacturers recommend changing the oil before seasonal storage.
Use the oil grade and filter specified in the manual.
Follow these steps:
-
Position the engine as directed for an oil change.
-
Prepare a drain container or approved oil extraction pump.
-
Remove the old oil using the manufacturer’s method.
-
Remove the old oil filter if your model has one.
-
Install the correct new filter and any required seal.
-
Add the recommended amount of fresh engine oil.
-
Check the oil level using the specified procedure.
Do not overtighten the filter or drain plug. Incorrect tightening can damage threads or seals.
If the manual calls for checking the oil after running the engine, follow the prescribed procedure and then check for leaks.
Dispose of the old oil and filter properly.
Step 5: Inspect and Change the Gearcase Oil
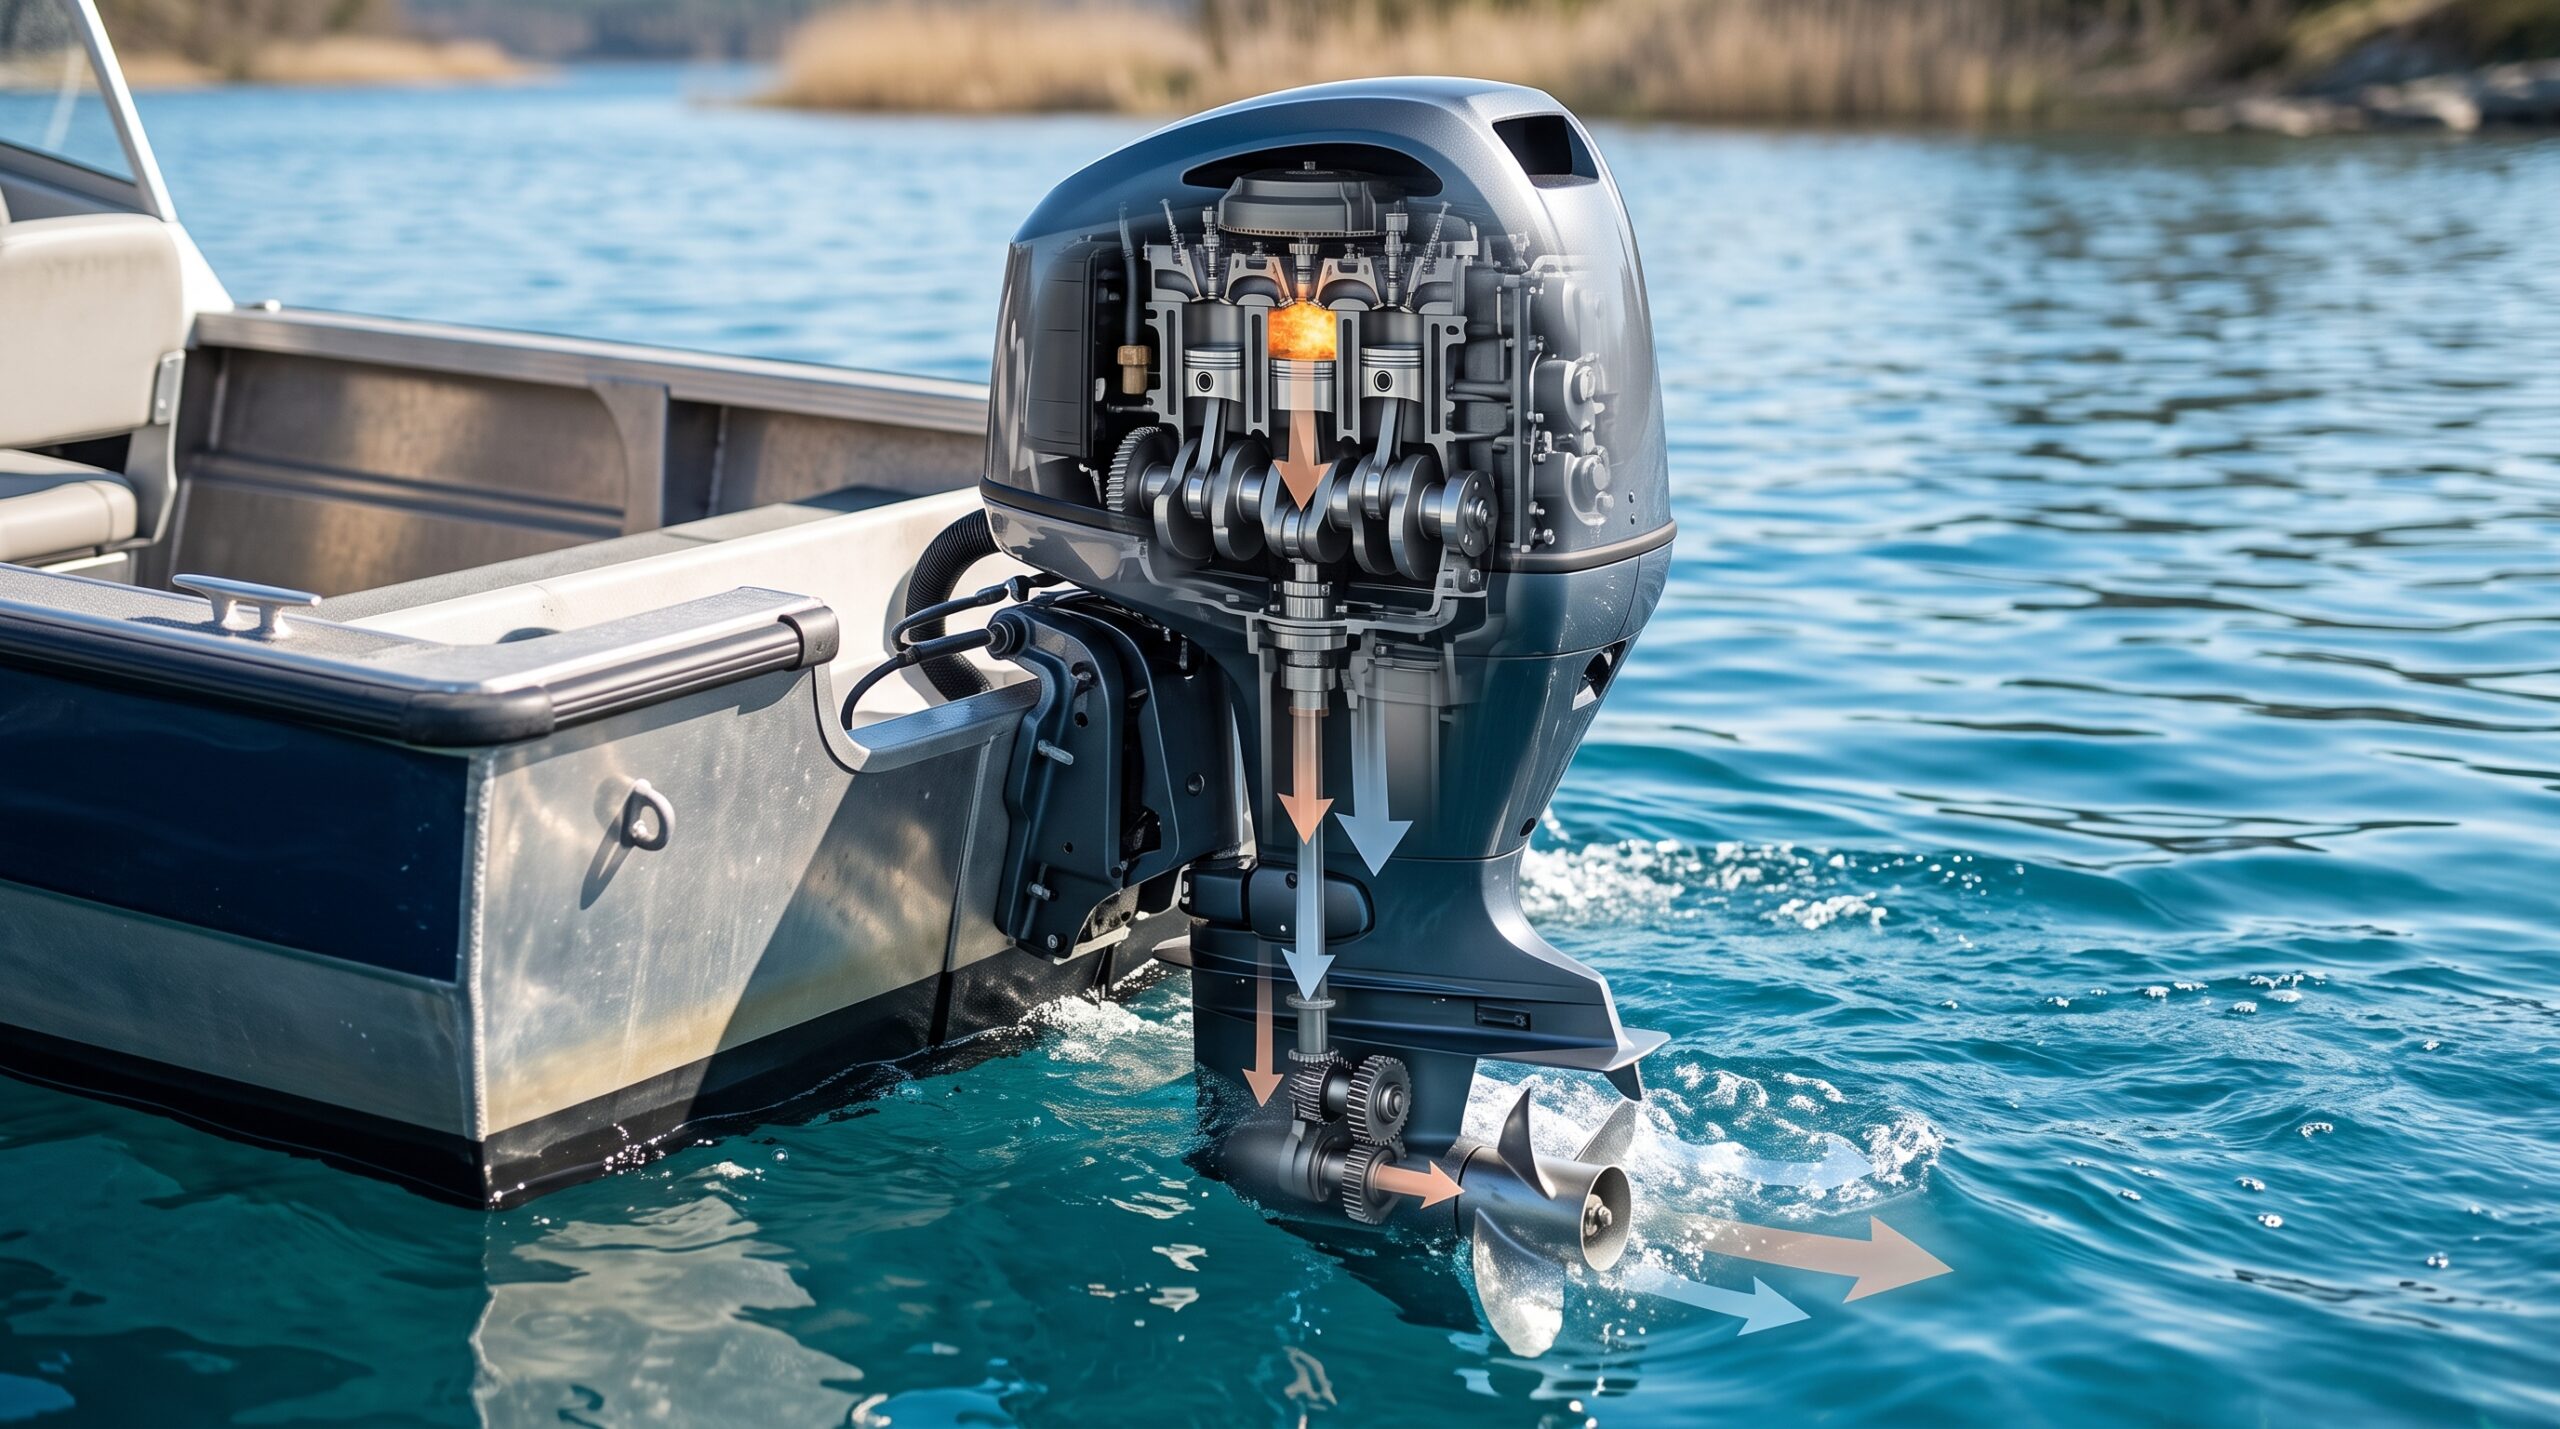
The gearcase contains gears and bearings that transfer engine power to the propeller. It uses a separate lubricant.
Inspect the gearcase oil according to the manufacturer’s service procedure. Some maintenance schedules recommend changing it before winter storage.
Look for signs of water contamination, such as unusually cloudy or milky lubricant. Also check for metal particles or other unusual material.
A small amount of normal wear material may be expected, depending on the engine and service interval. However, significant metal debris, milky oil, or visible water deserves professional attention.
Use the correct gearcase lubricant and replacement sealing washers where required.
Many gearcases are filled from the lower opening until lubricant reaches the upper level opening. However, procedures differ, so use your model’s instructions.
If you suspect water has entered the gearcase, do not ignore the problem. Have the seals and internal parts inspected before storing or operating the engine.
Step 6: Prepare the Fuel System
Fuel preparation depends on the engine design, the gasoline you use, and the expected storage period.
For many gasoline-powered four-stroke outboards, the recommended procedure includes treating suitable fuel with a marine stabilizer.
Use a product approved for your fuel system and follow its label. If the manual instructs you to circulate treated fuel through the system, do so using the specified safe procedure.
Do not disconnect fuel lines or open pressurized fuel systems unless you have the required training and instructions.
Some engines require a different approach to fuel storage. For example, certain models have specific procedures for the vapor separator or fuel injection system.
Do not drain the system simply because another boat owner recommends it. Follow the instructions for your engine.
Step 7: Protect Internal Engine Parts as Recommended
Some engines require internal corrosion protection during extended storage.
The manufacturer may recommend fogging oil, a special storage procedure, or another method to protect internal components.
Before applying anything, identify the correct product and the correct entry point. A procedure designed for a carbureted engine may not be appropriate for an electronically fuel-injected engine.
If the manufacturer advises against conventional fogging oil, do not use it.
Also avoid spraying products into an intake or electrical component without clear instructions. The wrong method can cause damage or create a fire risk.
When in doubt, ask an authorized marine service technician to carry out this step.
Step 8: Inspect Spark Plugs and Other Components
Inspect the spark plugs if the maintenance schedule calls for it.
Look for cracks, damaged electrodes, heavy deposits, or other signs of wear. Replace plugs when required, using the correct type and gap specification.
While inspecting the engine, check:
-
Fuel hoses and visible connections
-
Cooling-water hoses
-
Accessible wiring and connectors
-
Engine mounting hardware
-
Warning indicators and visible sensors
-
Signs of oil or fuel leaks
Do not pull apart sealed electrical components or alter sensor settings without the correct service information.
If you find damaged hoses, loose fittings, or deteriorated wiring, arrange repairs before the next boating season.
Step 9: Lubricate Moving Parts and Steering Components
Some external moving parts require periodic lubrication.
Depending on the engine, these may include approved pivot points, steering linkages, and other exposed mechanisms.
Use marine grease or another lubricant specified by the manufacturer.
Wipe away dirt before applying lubricant. Dirt trapped in grease can contribute to wear.
Do not lubricate every visible part indiscriminately. Some components need a particular product, while others should remain free of grease.
Inspect the steering system for stiffness, excessive play, corrosion, or damaged parts. A steering problem is a safety concern, not just a maintenance issue.
Step 10: Check the Propeller and Propeller Shaft
Remove and inspect the propeller if your owner’s manual permits routine owner maintenance.
Look for:
-
Bent or damaged blades
-
Fishing line wrapped around the shaft
-
Corrosion
-
Unusual movement or looseness
-
Signs of damage around the propeller hub
Fishing line can damage the propeller shaft seal and allow water into the gearcase.
If you find line around the shaft, remove it carefully without cutting or damaging the seal. Have the seal checked if there is any doubt about its condition.
Inspect the propeller shaft and apply the specified marine grease if required. Reinstall the propeller with the correct hardware and torque.
If the shaft is bent or the propeller has serious damage, arrange a professional inspection.
Completing these ten steps provides a useful foundation for understanding how to winterize a 4 stroke outboard motor. The remaining tasks focus on fuel, corrosion, and storage conditions.
How to Protect the Fuel System During Winter Storage
Fuel problems are a common concern when an engine sits unused for months. Proper storage can help reduce the chance of difficult spring starts.
When to Use Marine Fuel Stabilizer
Use marine fuel stabilizer when the manufacturer recommends it for your fuel and storage period.
Check the product label to confirm that it is suitable for your engine. Measure the correct amount based on the quantity of fuel in the tank.
For example, if a stabilizer treats a stated volume of gasoline, calculate the required dose using that ratio. Do not guess or add several products together.
Some stabilizers need treated fuel to circulate through the engine before storage. Others may have different instructions.
Remember that stabilizer helps slow fuel deterioration; it cannot make contaminated gasoline safe or restore fuel that has already degraded badly.
How to Handle Ethanol-Blended Fuel
Many gasoline blends contain ethanol. Ethanol-blended fuel can be suitable for an outboard when it meets the engine manufacturer’s requirements.
However, water contamination and prolonged storage can create problems. Under certain conditions, enough water can cause the ethanol and water to separate from the gasoline.
To reduce risk:
-
Use fuel that meets the engine’s specifications.
-
Buy fuel from a reliable source.
-
Keep the tank and fuel system in good condition.
-
Inspect for water contamination when indicated.
-
Follow the manufacturer’s storage recommendations.
Do not use a higher ethanol blend than your engine permits.
Should You Drain the Fuel System or Keep It Full?
There is no single rule for every outboard.
Some engines are designed to be stored with treated fuel in the system. Others require particular draining or fuel-system preparation steps.
The correct choice depends on the engine, the tank design, the fuel type, and the expected storage period.
Portable tanks may have different requirements from built-in tanks. Never leave a fuel tank in a sealed, unventilated area where gasoline vapors could accumulate.
Do not drain gasoline into the ground, a drain, or a waterway. If fuel must be removed, use a safe, approved method and arrange proper disposal.
How to Prevent Fuel Injector and Carburetor Problems
Fuel injectors and carburetors can develop deposits when fuel deteriorates.
Follow the recommended storage procedure, use suitable fuel, and maintain fuel filters according to the service schedule.
Do not use unapproved cleaning chemicals or disassemble a fuel injector system without the required tools and training.
If the engine already has starting trouble, have the cause identified before winter storage. A fuel problem that exists today may be harder to diagnose after several months of inactivity.
How to Protect a 4 Stroke Outboard Motor From Corrosion
Corrosion protection matters in both coastal and freshwater environments. Saltwater generally creates a greater corrosion challenge, but moisture can affect any boat engine.
Rinse Saltwater From the Engine
Flush the cooling system with freshwater after saltwater use, following the manufacturer’s instructions.
Also clean accessible external surfaces using an approved method. Avoid directing high-pressure water at electrical connections, seals, air intakes, or other sensitive areas.
Remove salt deposits before applying protective products.
Allow the engine to drain and dry as directed. Do not cover a wet engine with an airtight cover.
Apply Manufacturer-Approved Corrosion Protection
Use an appropriate marine corrosion inhibitor on the external areas specified in the manual.
Keep protective products away from surfaces where they could cause problems, including belts, friction surfaces, certain rubber components, and electrical contacts that require a different treatment.
Never spray flammable products near hot engine parts or an ignition source.
If your engine has a built-in corrosion protection system, inspect and maintain it according to the service schedule.
Inspect Anodes and Metal Components
Sacrificial anodes help protect certain metal parts by corroding in place of those parts.
Inspect the anodes for wear and replace them when they reach the manufacturer’s replacement limit.
Do not paint anodes or cover them with grease. Their exposed surfaces must remain able to perform their protective function.
Check the mounting hardware, brackets, and other exposed metal components for unusual corrosion.
Keep Electrical Connections Clean and Dry
Moisture and corrosion can affect battery terminals, connectors, and exposed wiring.
Inspect accessible connections for corrosion, loose fittings, or damaged insulation. Use the manufacturer’s recommended protective products where appropriate.
Disconnect the battery according to the manual before performing work that requires it.
Do not apply grease or sprays indiscriminately to electrical contacts. Some connections require specific contact treatments, and incorrect products can interfere with them.
How to Store a 4 Stroke Outboard Motor in Winter
After maintenance is complete, choose a storage position and location that protect the engine from water, dirt, and accidental damage.
Store the Motor in the Recommended Position
The correct storage position depends on your outboard model.
Many outboards are designed to be stored vertically so that water can drain from the cooling system. Some can be tilted or stored in other positions under specific conditions.
Before lifting or tilting the engine, check the manual. Incorrect positioning may allow water or oil to move into areas where it does not belong.
If the motor remains mounted on the boat, use the recommended trim or tilt position. If it is removed, use a suitable stand that supports its weight and keeps it stable.
Never rely on an improvised stand that could tip over.
Choose a Dry, Well-Ventilated Storage Area
A dry garage, covered storage space, or suitable marine storage facility can protect the motor from rain and snow.
Good ventilation helps moisture escape and reduces the risk of condensation. Keep the engine away from standing water, corrosive chemicals, and direct exposure to harsh weather.
If you store a motor in an unheated building, account for freezing temperatures. Follow the manufacturer’s instructions for draining and storage.
Fuel must be stored only in approved containers or tanks, under applicable safety rules. Keep gasoline away from heaters, flames, sparks, and other ignition sources.
Use a Breathable Motor Cover
A suitable motor cover protects the engine from dust and debris.
Choose a cover designed for your engine and storage environment. It should fit securely without trapping moisture.
Avoid wrapping the motor tightly in plastic unless the manufacturer specifically recommends that arrangement. A non-breathable cover can trap condensation and promote corrosion.
Check the cover occasionally for dampness, tears, or signs of animal activity.
Protect the Engine From Moisture and Rodents
Rodents may chew wiring, hoses, and other soft materials. Moist storage areas may also encourage corrosion.
Inspect the storage space for signs of pests before covering the engine.
Use appropriate pest-prevention methods around the storage area, but do not place chemicals where they could contaminate the engine or fuel system.
Avoid blocking engine openings with materials that could be forgotten at spring startup. If you use any approved protective plugs or covers, label them and keep a record of their locations.
Common Winterization Mistakes to Avoid
Even a well-maintained engine can develop problems if a key storage step is missed. Avoid these common errors when preparing your motor.
Forgetting to Change Engine Oil
Old oil may contain contaminants from normal use. Skipping a scheduled oil change can leave the engine with used lubricant during storage.how to winterize a 4 stroke outboard motorhow to winterize a 4 stroke outboard motor
Check the maintenance schedule and change the oil when due. Use the correct grade and quantity.how to winterize a 4 stroke outboard motor
If the oil looks milky or contains unusual material, investigate the cause rather than simply replacing it and assuming the issue is solved.how to winterize a 4 stroke outboard motor
Using the Wrong Fuel Stabilizer
Not every fuel additive is suitable for every engine or fuel type.
Choose a product that meets your manufacturer’s requirements. Follow the label, measure the correct amount, and observe any instructions about running the engine to circulate treated fuel.
Do not combine multiple additives unless the manufacturer specifically permits it.how to winterize a 4 stroke outboard motor
Skipping Gearcase Oil Inspection
The gearcase is exposed to water and operates under demanding conditions.
Ignoring the lubricant can allow a water leak or seal problem to go unnoticed until the next season.
Inspect and replace gearcase oil according to the service schedule. If you see signs of water contamination, have the gearcase checked before storage.
Using Fogging Oil When the Manufacturer Advises Against It
Fogging oil is not a universal winterization product.how to winterize a 4 stroke outboard motor
Some engines require a particular procedure, while others may not need conventional fogging oil. Using an incorrect method can create problems with the intake, combustion system, or other components.
Read the manufacturer’s instructions before using any internal storage treatment.
Storing the Motor in the Wrong Position
The wrong tilt or storage position may prevent proper drainage or allow fluids to move into unsuitable areas.
Follow the instructions for your exact engine. If the manual specifies a vertical position, do not assume that a fully tilted position is equally safe.
Can You Winterize a 4 Stroke Outboard Motor Yourself?
Yes, many owners can perform basic winter maintenance if they have the right tools, understand the procedures, and follow the manufacturer’s instructions.how to winterize a 4 stroke outboard motor
However, some fuel, electrical, and internal engine procedures require specialist knowledge.
Basic Maintenance You Can Do at Home
Depending on your experience and the owner’s manual, you may be able to:
-
Wash and flush the engine.
-
Change engine oil and the filter.how to winterize a 4 stroke outboard motor
-
Inspect gearcase oil.
-
Apply approved external corrosion protection.
-
Inspect the propeller and visible components.
-
Check accessible hoses and electrical connections.
-
Prepare the storage area and cover the engine.
Work slowly and keep a record of what you have done.
If a task requires a special service tool or a procedure you do not understand, do not guess. Ask a qualified technician for guidance.
When to Contact a Marine Mechanic
Professional help is advisable if you find:
-
Milky gearcase oil or suspected water intrusion
-
Damaged seals or a bent propeller shaft
-
Fuel leaks or damaged fuel lines
-
Persistent overheating warnings
-
Unusual engine noises
-
Serious corrosion or damaged wiring
-
Problems with electronic fuel injection
-
A need for manufacturer-specific internal engine protection
You should also seek help if the engine has not been serviced for a long time or has a history of starting problems.
DIY Winterization vs. Professional Service
DIY maintenance can save labor costs when the work is within your abilities.
Professional service may provide additional value if the motor has complex systems or needs repairs. A marine mechanic can also identify problems that may not be obvious during a basic visual inspection.
| Factor | DIY maintenance | Professional service |
|---|---|---|
| Cost | Often lower for routine work | Includes labor charges |
| Tools | You supply the tools | Specialist tools may be available |
| Experience | Depends on your skills | Performed by a trained technician |
| Complex faults | May be hard to diagnose | Better suited to advanced repairs |
| Best use | Routine tasks you understand | Unfamiliar procedures or suspected faults |
The safest choice is the one that follows the manufacturer’s requirements and ensures that all necessary work is completed correctly.
How Often Should You Winterize an Outboard Motor?
Winterization frequency depends on the climate, how often you use the boat, and how long the engine will remain unused.
Seasonal Winterization
If your boating season ends each year and the engine will sit unused through cold months, prepare it before long-term storage.
Do not wait until freezing weather arrives. Plan the work while temperatures are suitable and you have time to address any problems.
For boats used in saltwater, continue routine flushing and corrosion care throughout the season rather than waiting until winter.
Preparing a Motor for Long-Term Storage
Long-term storage can require more preparation than a short break between trips.how to winterize a 4 stroke outboard motor
Follow the manufacturer’s guidance for fuel, oil, internal protection, battery care, and storage conditions.how to winterize a 4 stroke outboard motor
If the motor will remain unused beyond the period covered by the normal seasonal procedure, ask the manufacturer or an authorized dealer whether additional steps are needed.
Check the engine periodically if practical, without disturbing protective measures or creating unnecessary operating risks.
Winterizing in Mild Climates
A mild climate does not remove the need for storage maintenance.
Even without freezing temperatures, gasoline can deteriorate, moisture can collect, and corrosion can develop.
If you use the boat throughout the year, follow the regular service schedule and prepare the engine whenever it will be stored for an extended period.
In areas with occasional cold snaps, make sure the engine is protected before temperatures drop.
How to Prepare Your Outboard Motor for Spring
Winterization is only one part of engine care. Before using the boat again, inspect the motor to make sure it is ready for operation.
Inspect Oil, Fuel, and Gearcase Lubricant
Check the engine oil level according to the manual.
Look for leaks, unusual color changes, or signs of contamination. Inspect the gearcase lubricant if required by the maintenance schedule or if a problem was identified during storage.
Check the fuel condition and make sure the system is prepared for use according to the manufacturer’s instructions.
Do not use fuel that appears contaminated or has an unusual odor. If you suspect a fuel problem, seek professional advice on safe handling and disposal.
Check the Battery and Electrical System
Inspect the battery case, terminals, cables, and mounting hardware.
Charge the battery using a charger compatible with its type. Follow the battery manufacturer’s instructions for charging and storage.
Check accessible wiring for damage, corrosion, or loose connections.
If you disconnected the battery for winter storage, reconnect it using the correct procedure. Ensure that all connections are secure before starting the engine.
Inspect the Propeller and Cooling System
Check the propeller for damage and confirm that it is securely installed.
Inspect the cooling-water intake area for debris or obstructions. Look for signs of damage to accessible hoses and fittings.
If you removed the propeller during winterization, confirm that it has been reinstalled correctly with the required hardware and torque.
Do not operate the engine if you suspect the cooling system is blocked or damaged.
Perform Safe Startup Checks Before Launching
Before starting the motor, make sure the boat is secure and the area is well ventilated.
Follow the manufacturer’s startup procedure and supply cooling water as required. Confirm that the engine has the correct oil level and that there are no visible fuel leaks.
Check the warning indicators and cooling-water flow according to the manual.
If you hear unusual noises, see a warning, notice a leak, or suspect overheating, shut the engine down safely and investigate the problem before taking the boat out.
Do not launch until the engine, steering, and other safety-critical systems are working correctly.
FAQ
Do all 4 stroke outboard motors need winterizing?
Most four-stroke outboards benefit from proper preparation before extended storage. The exact procedure depends on the model, climate, fuel system, and storage period.
Even in mild climates, you should protect the engine from moisture, fuel deterioration, and corrosion. Follow the owner’s manual for the recommended maintenance schedule.
Can you winterize a 4 stroke outboard without fogging oil?
Yes, some four-stroke outboards can be prepared for storage without conventional fogging oil. Others require a specific internal protection procedure.
Check your manufacturer’s instructions before deciding. Never skip a required protection step or use fogging oil in a way the manufacturer does not approve.
Should you change the oil before winter storage?
Many manufacturers recommend changing engine oil before seasonal storage, particularly when the oil is due for replacement.
Fresh oil helps ensure that used lubricant and its normal contaminants are not left in the engine throughout the storage period.
Check your service schedule and use the specified oil grade and quantity.
Do you need to use fuel stabilizer in a four-stroke outboard?
Fuel stabilizer is often recommended when gasoline will remain in the system during extended storage. However, the need depends on the fuel type, storage duration, and manufacturer’s instructions.
Use a marine product compatible with your engine. Follow the label and remember that stabilizer cannot repair badly degraded or contaminated fuel.how to winterize a 4 stroke outboard motor
Can a 4 stroke outboard motor freeze in winter?
Yes, freezing conditions can damage an outboard if water remains trapped in vulnerable areas.how to winterize a 4 stroke outboard motor
Many outboards are designed to drain in a specified position, but correct storage procedures are still essential. Follow the manufacturer’s flushing and drainage instructions before temperatures fall below freezing.
If you are unsure whether the cooling system has drained properly, contact a marine mechanic.how to winterize a 4 stroke outboard motor
Should an outboard motor be stored up or down?
The correct position depends on the engine model.
Many outboards should be stored vertically to help water drain from the cooling system. Some models permit other positions under specific conditions.
Consult the owner’s manual instead of assuming that tilting the motor fully upward is always safe.
How long does it take to winterize a 4 stroke outboard motor?
The time depends on the engine size, its condition, the work required, and your experience.
A straightforward maintenance session may take a few hours. A motor that needs additional repairs, extensive corrosion treatment, or specialist fuel-system service may take longer.
Allow enough time to complete each step carefully. Rushing oil changes, fuel preparation, or storage procedures can lead to missed maintenance tasks.how to winterize a 4 stroke outboard motor
Conclusion
Proper winterization helps protect your outboard motor from cold weather, moisture, corrosion, and fuel-related problems. The process begins with checking the owner’s manual and flushing the engine correctly. You should then perform the required oil and filter changes, inspect the gearcase lubricant, prepare the fuel system, and apply approved corrosion protection.how to winterize a 4 stroke outboard motor
Before storage, inspect the propeller, steering components, electrical connections, and visible hoses. Keep the motor in the recommended position and use a suitable cover in a dry, well-ventilated area.how to winterize a 4 stroke outboard motor
The most reliable approach to how to winterize a 4 stroke outboard motor is to follow the manufacturer’s instructions for your exact model, address any faults before storage, and check the engine carefully before using it again in spring.