

Our Blogs
Disc Brake Conversion: Best Kits, Real Costs & Fit Guide (2026)

That order is backwards, and it is how people get hurt.
This guide covers what a disc brake conversion actually changes, how to choose a kit, the hydraulic parts nobody tells you about, what it costs, and the mistakes that turn a safety upgrade into a car that stops worse than it did before.
What Is a Disc Brake Conversion?
A disc brake conversion replaces your car’s original drum brakes with disc brakes: a rotor that spins with the wheel, and a caliper that squeezes pads against it.
Most classic American cars left the factory with drums on all four corners. Drum brakes are not a bad design — they were cheap, they self-adjust, and they hold a parked car well. What they do badly is repeat. A drum brake traps heat inside a closed cast iron cylinder. After three or four hard stops that heat has nowhere to go, the shoes stop biting, and the pedal goes soft.
That is brake fade, and it is why a disc brake conversion exists.

Browse our brake systems.
Why a Disc Brake Conversion Is Worth It
The honest case, without the marketing:
- Fade resistance. This is the whole point. An exposed rotor sheds heat into the air. A drum cannot. On a mountain descent, or after two hard stops in traffic, this is the difference between a firm pedal and no pedal.
- Wet performance. Water sits inside a drum and stays there. A rotor throws it off within one rotation. A drum-braked car in heavy rain has a genuinely frightening first stop.
- Pedal feel. Drum brakes are self-energising — the rotating drum drags the shoe into itself, multiplying force. That is efficient, but it makes the pedal non-linear and grabby. Disc brakes respond in proportion to how hard you press.
- Consistency. Drums expand as they heat, which changes the pedal. Discs do not, in any way you will feel.
- Maintenance. Pad changes take minutes. Drum shoe replacement involves springs, a special tool, and a certain amount of language.
And the honest counter-argument
If your car is a numbers-matching concours restoration that is driven to shows on a trailer, a disc brake conversion will reduce its value and gain you nothing. Original is original.
For anything you actually drive, do it. And if you have increased the engine’s power — a crate engine, an LS swap, anything — a disc brake conversion is not optional. Doubling the power without touching the brakes creates a car that goes twice as fast toward the thing it can no longer stop for.
Front Disc Brake Conversion or Four-Wheel?
Here is something most sellers will not tell you.
Under braking, weight transfers forward. The front axle does roughly 70–80% of the stopping. That means a front disc brake conversion delivers the overwhelming majority of the available benefit, at a fraction of the cost of doing all four corners.
| Front Disc Brake Conversion | Four-Wheel Disc Brake Conversion | |
|---|---|---|
| Share of the benefit | The large majority | The rest, plus consistency |
| Cost | Lower | Roughly double, often more |
| Complexity | Straightforward | Parking brake becomes a real problem — see below |
| Best for | Most street cars. Start here. | High power, track use, or when you want the look |
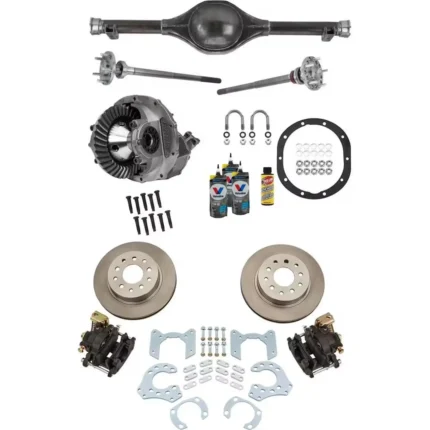
The rear parking brake problem. Drum brakes have a mechanical parking brake built in. Rear discs do not. A rear disc brake conversion therefore needs either a caliper with an integrated parking brake mechanism, or a small “drum-in-hat” parking brake inside the rotor. Both work. Both cost money. Neither is usually mentioned in the kit’s headline price.
Our 1964–66 Mustang 9-Inch Rear Axle Kit ($1,600) includes a disc parking brake for exactly this reason.
My recommendation: start with a front disc brake conversion. Drive the car. If you then want more, do the rear. Doing the front first is never wasted work.
What Is Actually in a Disc Brake Conversion Kit

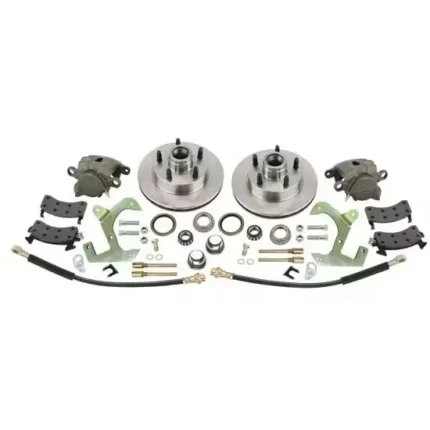
A typical front disc brake conversion kit contains:
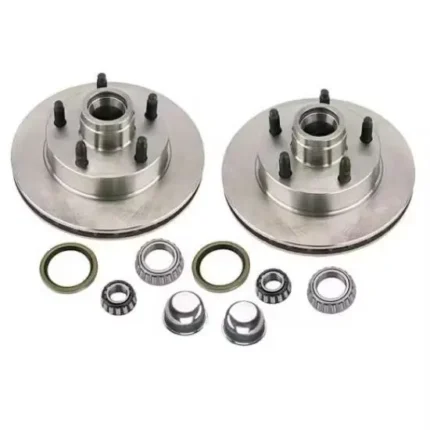
- Rotors
- Calipers
- Brake pads
- Caliper mounting brackets
- Wheel bearings and seals
- Flexible brake hoses
- Hardware
What it very often does not contain — and what you will absolutely need:
- The correct master cylinder
- A proportioning valve
- The right residual pressure valves
- A brake booster, if you are going to power brakes
- Hard lines and fittings
- Spindles, on some applications
- Brake fluid
The next section explains why those first three are not optional, and why ignoring them is how a disc brake conversion ends up stopping worse than the drums it replaced.
The Hydraulics: The Part That Ruins Disc Brake Conversions
This is the most important section in this guide. It is also the part that almost every disc brake conversion article skips.
Drum brakes and disc brakes want completely different hydraulics. Bolt discs onto a car that still has a drum master cylinder and drum valving, and you will have a bad brake system with shiny new parts on it.

1. The Master Cylinder
Drum brakes are self-energising — the drum helps drag the shoe into itself. Discs are not. They need more fluid volume and more line pressure to do the same job.
Two things matter:
- Bore size. Too large and the pedal is rock hard with barely any travel. Too small and the pedal sinks toward the floor before anything happens. A disc/drum street car commonly runs somewhere around a 1″ to 1-1/8″ bore, but the correct figure depends on your caliper piston area, your pedal ratio and whether you are running a booster. Ask the kit manufacturer. Do not guess.
- Reservoir size. A disc/drum master cylinder has a larger front reservoir. As disc pads wear, the caliper pistons extend and permanently hold more fluid. A drum master cylinder with equal reservoirs will run the disc circuit low. This is not a detail — it is a design requirement.
2. The Proportioning Valve
Weight transfers forward under braking, which unloads the rear axle. Feed the rear brakes full pressure and they will lock before the fronts do. A car with locked rear wheels and rolling front wheels will spin.
A proportioning valve reduces pressure to the rear circuit. An adjustable proportioning valve lets you tune it to your car’s actual weight distribution, which is the right answer for a modified car — because your weight distribution is no longer whatever the factory assumed.
3. Residual Pressure Valves
This one catches almost everybody.
- Drum circuits want a 10 psi residual valve. It holds the shoes lightly against the drum so they do not retract too far.
- Disc circuits want a 2 psi residual valve — or none at all. Just enough to stop fluid draining back if the master cylinder is mounted below the calipers.
Put a 10 psi valve on a disc circuit and the pads never fully release. The brakes drag. The rotors glow. The fluid boils. The car pulls, then the pedal goes to the floor.
Many drum master cylinders have a 10 psi residual valve built into the outlet port. If you are reusing any part of the old system, find out.
4. The Combination Valve
Most factory disc/drum systems use a combination valve that bundles three functions: proportioning for the rear, a metering valve that briefly delays the front discs so the rear drums engage first on light braking, and a pressure differential switch that lights the dashboard warning lamp if one circuit fails.
Fitting one is the tidy solution. Fitting nothing is not a solution.
If you take one thing from this guide: a disc brake conversion is a hydraulic system conversion, not a bolt-on parts swap. Budget for the master cylinder and the valving from the start.
Power or Manual Brakes?
A disc brake conversion forces this decision, and there is a trap in it for anyone running a performance camshaft.
Vacuum Booster
The standard solution. It multiplies your pedal effort using engine vacuum.
The trap: a vacuum booster typically wants around 18 in-Hg of manifold vacuum. A big performance camshaft can drop idle vacuum to 10–12 in-Hg or lower. Not enough vacuum means not enough boost, which means a hard pedal exactly when you need it.
People fit a lopey cam, then a disc brake conversion, and cannot understand why the brakes feel terrible. This is why.
Hydroboost
Uses pressure from the power steering pump instead of engine vacuum. It does not care what your camshaft does. It is compact, it is powerful, and for any car with a serious cam — or an LS swap — it is usually the right answer.
Costs more. Worth it.
Manual Brakes
No booster at all. Higher pedal effort, but excellent feel and modulation, and one less thing to fail.
The critical detail: pedal ratio. Manual brakes need roughly a 6:1 pedal ratio. Power brakes use around 4:1. Bolt a manual master cylinder to a power brake pedal and the leverage is wrong — you will need to stand on it.
Check the pedal ratio before you commit to manual brakes. It is measured, not assumed.
| Setup | Pedal Effort | Needs | Best For |
|---|---|---|---|
| Vacuum booster | Light | ~18 in-Hg vacuum | Mild cams, stock-ish engines |
| Hydroboost | Light | Power steering pump | Big cams, LS swaps, high power |
| Manual | Firm | ~6:1 pedal ratio | Light cars, purists, track cars |
Rotors and Calipers: What Actually Matters
Rotors
| Type | Verdict |
|---|---|
| Solid | Fine for light cars and rear axles. Less heat capacity. |
| Vented | Internal vanes pump air through the rotor. The right default for any front disc brake conversion. |
| Slotted | Slots clear pad debris and gas. Mild real benefit. Reasonable for street and track. |
| Drilled | Looks superb. Cross-drilling was originally for outgassing on 1960s pad compounds that no longer exist. Modern pads do not need it, and the holes are stress risers that can crack under sustained heat. Buy them for the appearance if you want — just know what you are buying. |
For most street cars, a plain vented rotor with a good pad is the best-performing choice. That is not the exciting answer, but it is the true one.
Calipers
- Single-piston floating. Simple, cheap, entirely adequate for a mild street car.
- 4-piston fixed. Even clamping across the pad, better modulation, more heat capacity. The sweet spot for a street or street/strip disc brake conversion.
- 6-piston. Bigger rotors, more clamping area, more unsprung weight, considerably more money. Real gains on track. On the street, diminishing returns.
Wilwood — whose kits we stock — publish a brake kit advisor that matches caliper and rotor packages to specific chassis. Their Tri-Five and Mustang ranges are a good reference for what a properly specified disc brake conversion looks like.
Pads
- Ceramic. Quiet, low dust, good cold bite. The right choice for a street car.
- Semi-metallic. Higher heat tolerance, noisier, dustier, harder on rotors.
- Race compounds. Superb hot. Genuinely dangerous cold. Do not put race pads on a street car — the first stop of the morning will not be there.
Wheel Clearance: Check This Before You Buy Anything
This is the most common reason a disc brake conversion kit ends up back in its box.

Your original 14″ or 15″ steel wheels were designed around a drum. A disc brake conversion caliper occupies space the drum never used.
Three things to check, in this order:
- Minimum wheel diameter. Every kit specifies one. If yours says 17″ and you are running 15″ wheels, the conversation is over — you are buying wheels too.
- Backspacing / offset. Even a large-enough wheel can foul the caliper if the wheel sits too far inboard.
- Wheel design. Some wheels have internal ribs, spokes or a hub face that fouls a caliper that a plain wheel of the same size would clear.
Most manufacturers publish a printable caliper clearance template. Print it, cut it out, hold it against the inside of your wheel. It takes five minutes and it has saved a great many people several hundred dollars.
If your disc brake conversion requires new wheels, add that to the budget now. A set of wheels can cost more than the brake kit.
What a Disc Brake Conversion Costs

| Item | Basic Front | Performance Front | Four-Wheel |
|---|---|---|---|
| Brake kit | $220 – $500 | $850 – $1,500 | $1,800 – $3,000 |
| Master cylinder | $120 | $180 | $220 |
| Proportioning / combination valve | $70 | $120 | $150 |
| Residual pressure valves | $40 | $40 | $60 |
| Booster (vacuum) | $180 | $250 | $280 |
| Hydroboost (instead of vacuum) | — | +$550 | +$550 |
| Lines, fittings, fluid | $120 | $180 | $260 |
| Rear parking brake solution | — | — | $250 – $500 |
| Parts subtotal | ~$750 | ~$1,850 | ~$3,400 |
| New wheels, if required | +$600 – $2,000 | +$600 – $2,000 | +$600 – $2,000 |
| Shop labour, if not DIY | +$400 – $800 | +$600 – $1,200 | +$1,000 – $2,000 |
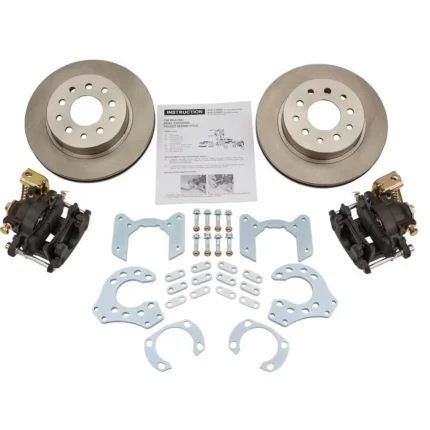
Entry-level example from our catalogue: the 1949–54 Chevy / 53–62 Corvette Front Disc Brake Conversion Kit at $220.
Want a real number rather than a range? Request a quote with your chassis and wheel size and we will price the whole system — hydraulics included.
Disc Brake Conversion: Installation Overview
This is an overview, not a substitute for the instructions in your kit. Brakes are the system that stops you. If you are not confident, have a professional do it or inspect it.
- Support the car properly. Stands, not a jack.
- Remove the drums, shoes, springs, backing plates and wheel cylinders. Keep nothing you were told to replace.
- Inspect the spindles. Some disc brake conversion kits reuse them, some need new or drop spindles. Check for wear and scoring.
- Fit the caliper brackets. Torque to the specified figure. Use a torque wrench, not judgement.
- Pack and fit the wheel bearings, then the rotors. Set preload exactly as specified.
- Mount the calipers. Check the pads sit square on the rotor and that nothing fouls at full lock.
- Fit the correct master cylinder. Bench-bleed it before installing. Skipping this is why people spend an entire afternoon fighting a spongy pedal.
- Plumb the valving. Proportioning valve on the rear circuit. Correct residual valves — 2 psi disc, 10 psi drum.
- Run new lines. Flexible hoses at the calipers. Double-flare the hard lines properly, or buy them pre-made.
- Bleed the system. Furthest wheel from the master first. Keep the reservoir topped up.
- Test at walking pace, in a safe, empty space. Then progressively faster. Feel for pull, drag or a sinking pedal.
- Bed the brakes in. See below. Do not skip it.
See our installation guides, or arrange professional installation.
Bedding In: The Twenty Minutes That Decide Everything

New pads and rotors must be bedded in. The process deposits a thin, even layer of pad material onto the rotor face. That layer is what the pad actually grips.
The procedure, broadly:
- Find a safe, empty, straight road.
- Make a series of moderate stops from around 35 mph down to about 5 mph — without coming to a complete halt.
- Repeat six to ten times, allowing a short interval between each.
- Then drive for several minutes without touching the brakes, to let everything cool.
- Do not sit at a stop with your foot on the pedal while the brakes are hot.
That last point matters more than it sounds. Holding a hot pad hard against one spot on a hot rotor deposits a thick patch of material in that spot. You then feel a pulsation through the pedal, and someone tells you the rotor is warped.
It is almost never warped. It is an uneven pad deposit, caused by a bad bed-in. Follow the procedure your pad manufacturer supplies — compounds differ.
Eight Disc Brake Conversion Mistakes
- Keeping the drum master cylinder. Wrong bore, wrong reservoir, often a built-in 10 psi residual valve on the disc circuit. The brakes will drag or the pedal will sink.
- No proportioning valve. The rears lock before the fronts. The car spins.
- The wrong residual pressure valve. 10 psi on a disc circuit and the pads never release. The rotors will glow.
- Not checking wheel clearance. The kit arrives, the caliper hits the wheel, and now you are buying wheels.
- A vacuum booster behind a big camshaft. Not enough vacuum, hard pedal. Run hydroboost instead.
- Manual brakes on a power pedal. Wrong pedal ratio, and you will be standing on it.
- Race pads on a street car. Superb hot, useless cold. The first stop of the day is the one that catches you out.
- Skipping the bed-in. Uneven pad deposits, judder, and a rotor everybody blames.
Disc Brake Conversion by Vehicle
Kit availability is excellent for the popular chassis and thin everywhere else. Wilwood’s application index is a good place to confirm what exists for yours.
- Tri-Five Chevy (1955–57). Enormously well supported. Pair the disc brake conversion with our tubular control arms, coilovers and sway bar kit ($1,125) — new brakes into worn front suspension geometry wastes half the benefit.
- 1949–54 Chevy / early Corvette. Direct kit available at $220 — one of the cheapest genuine safety upgrades in the hobby.
- C10 and squarebody trucks. Well supported front and rear.
- Early Mustang. Excellent kit availability. Our 1964–66 Mustang 9-inch rear axle kit ($1,600) arrives with the disc parking brake already solved.
- Street rods and T-Buckets. Light cars, so smaller kits work. But a light car with a large engine is exactly where brakes matter most.
Not sure what fits? Run a compatibility check or send us your details through part request.
Disc Brake Conversion FAQ
Is a disc brake conversion worth it?
For any car you actually drive, yes — and it is not close. The gain is not in a single hard stop; it is in the second, third and fourth. Drums fade. Discs do not. If you have raised the engine’s power at all, a disc brake conversion stops being an upgrade and becomes a requirement.
Do I need a new master cylinder for a disc brake conversion?
Almost certainly. Discs need more fluid volume and more line pressure than drums, and a disc/drum master cylinder has a larger front reservoir to allow for pad wear. Many drum master cylinders also carry a 10 psi residual valve that will make your new disc brakes drag. Fit the correct master cylinder.
Do I need a proportioning valve?
Yes. Weight transfers forward under braking. Without a proportioning valve limiting rear pressure, the rear wheels can lock before the fronts, which spins the car. An adjustable valve is the right choice for a modified vehicle.
Will a disc brake conversion fit my 15-inch wheels?
Sometimes. Every kit publishes a minimum wheel diameter, and many performance kits need 17″ or larger. Backspacing and internal wheel design matter too. Print the manufacturer’s caliper clearance template and check before you order.
Front disc brake conversion only, or all four wheels?
The front axle does roughly 70–80% of the braking, so a front-only disc brake conversion captures the large majority of the benefit at a fraction of the cost. Do the front first. Add the rear later if you want it.
Can I keep manual brakes with a disc brake conversion?
Yes, provided your pedal ratio is right — manual brakes want around 6:1, power brakes around 4:1. Expect a firmer pedal. Many people prefer the feel.
My car has a big camshaft. Will a vacuum booster work?
Probably not well. A vacuum booster typically wants around 18 in-Hg of manifold vacuum, and a performance cam can drop idle vacuum to 10–12 in-Hg or below. Use hydroboost, which runs off the power steering pump and does not care about your camshaft.
Are drilled rotors better?
They look better. Cross-drilling was developed for outgassing on pad compounds that are no longer used, and the holes can become stress risers that crack under sustained heat. For a street car, a plain vented rotor with a good pad performs at least as well, and slotted is a reasonable middle ground.
How long does a disc brake conversion take?
A front disc brake conversion is a weekend for a competent home mechanic, assuming every part is on hand — including the master cylinder and valving. It becomes a month if you discover mid-job that you needed a proportioning valve.
Why do my new brakes pulsate?
Usually not a warped rotor. It is normally an uneven deposit of pad material caused by a bad bed-in — most often by holding the pedal down at a stop while the brakes were still hot. Re-bed the brakes properly and it frequently disappears.
Where to Start
- Measure your wheels first. Diameter and backspacing. This determines which disc brake conversion kits are even possible.
- Be honest about the engine. Big cam? Plan for hydroboost now, not after the pedal disappoints you.
- Front first. It is most of the benefit for a fraction of the money.
- Budget the hydraulics with the kit, not after it. Master cylinder, proportioning valve, residual valves. They are the difference between a good conversion and a dangerous one.
- Bed them in properly. Twenty minutes.
3 thoughts on “Disc Brake Conversion: Best Kits, Real Costs & Fit Guide (2026)”