


Our Blogs
How to Winterize a 2 Stroke Outboard Motor Properly

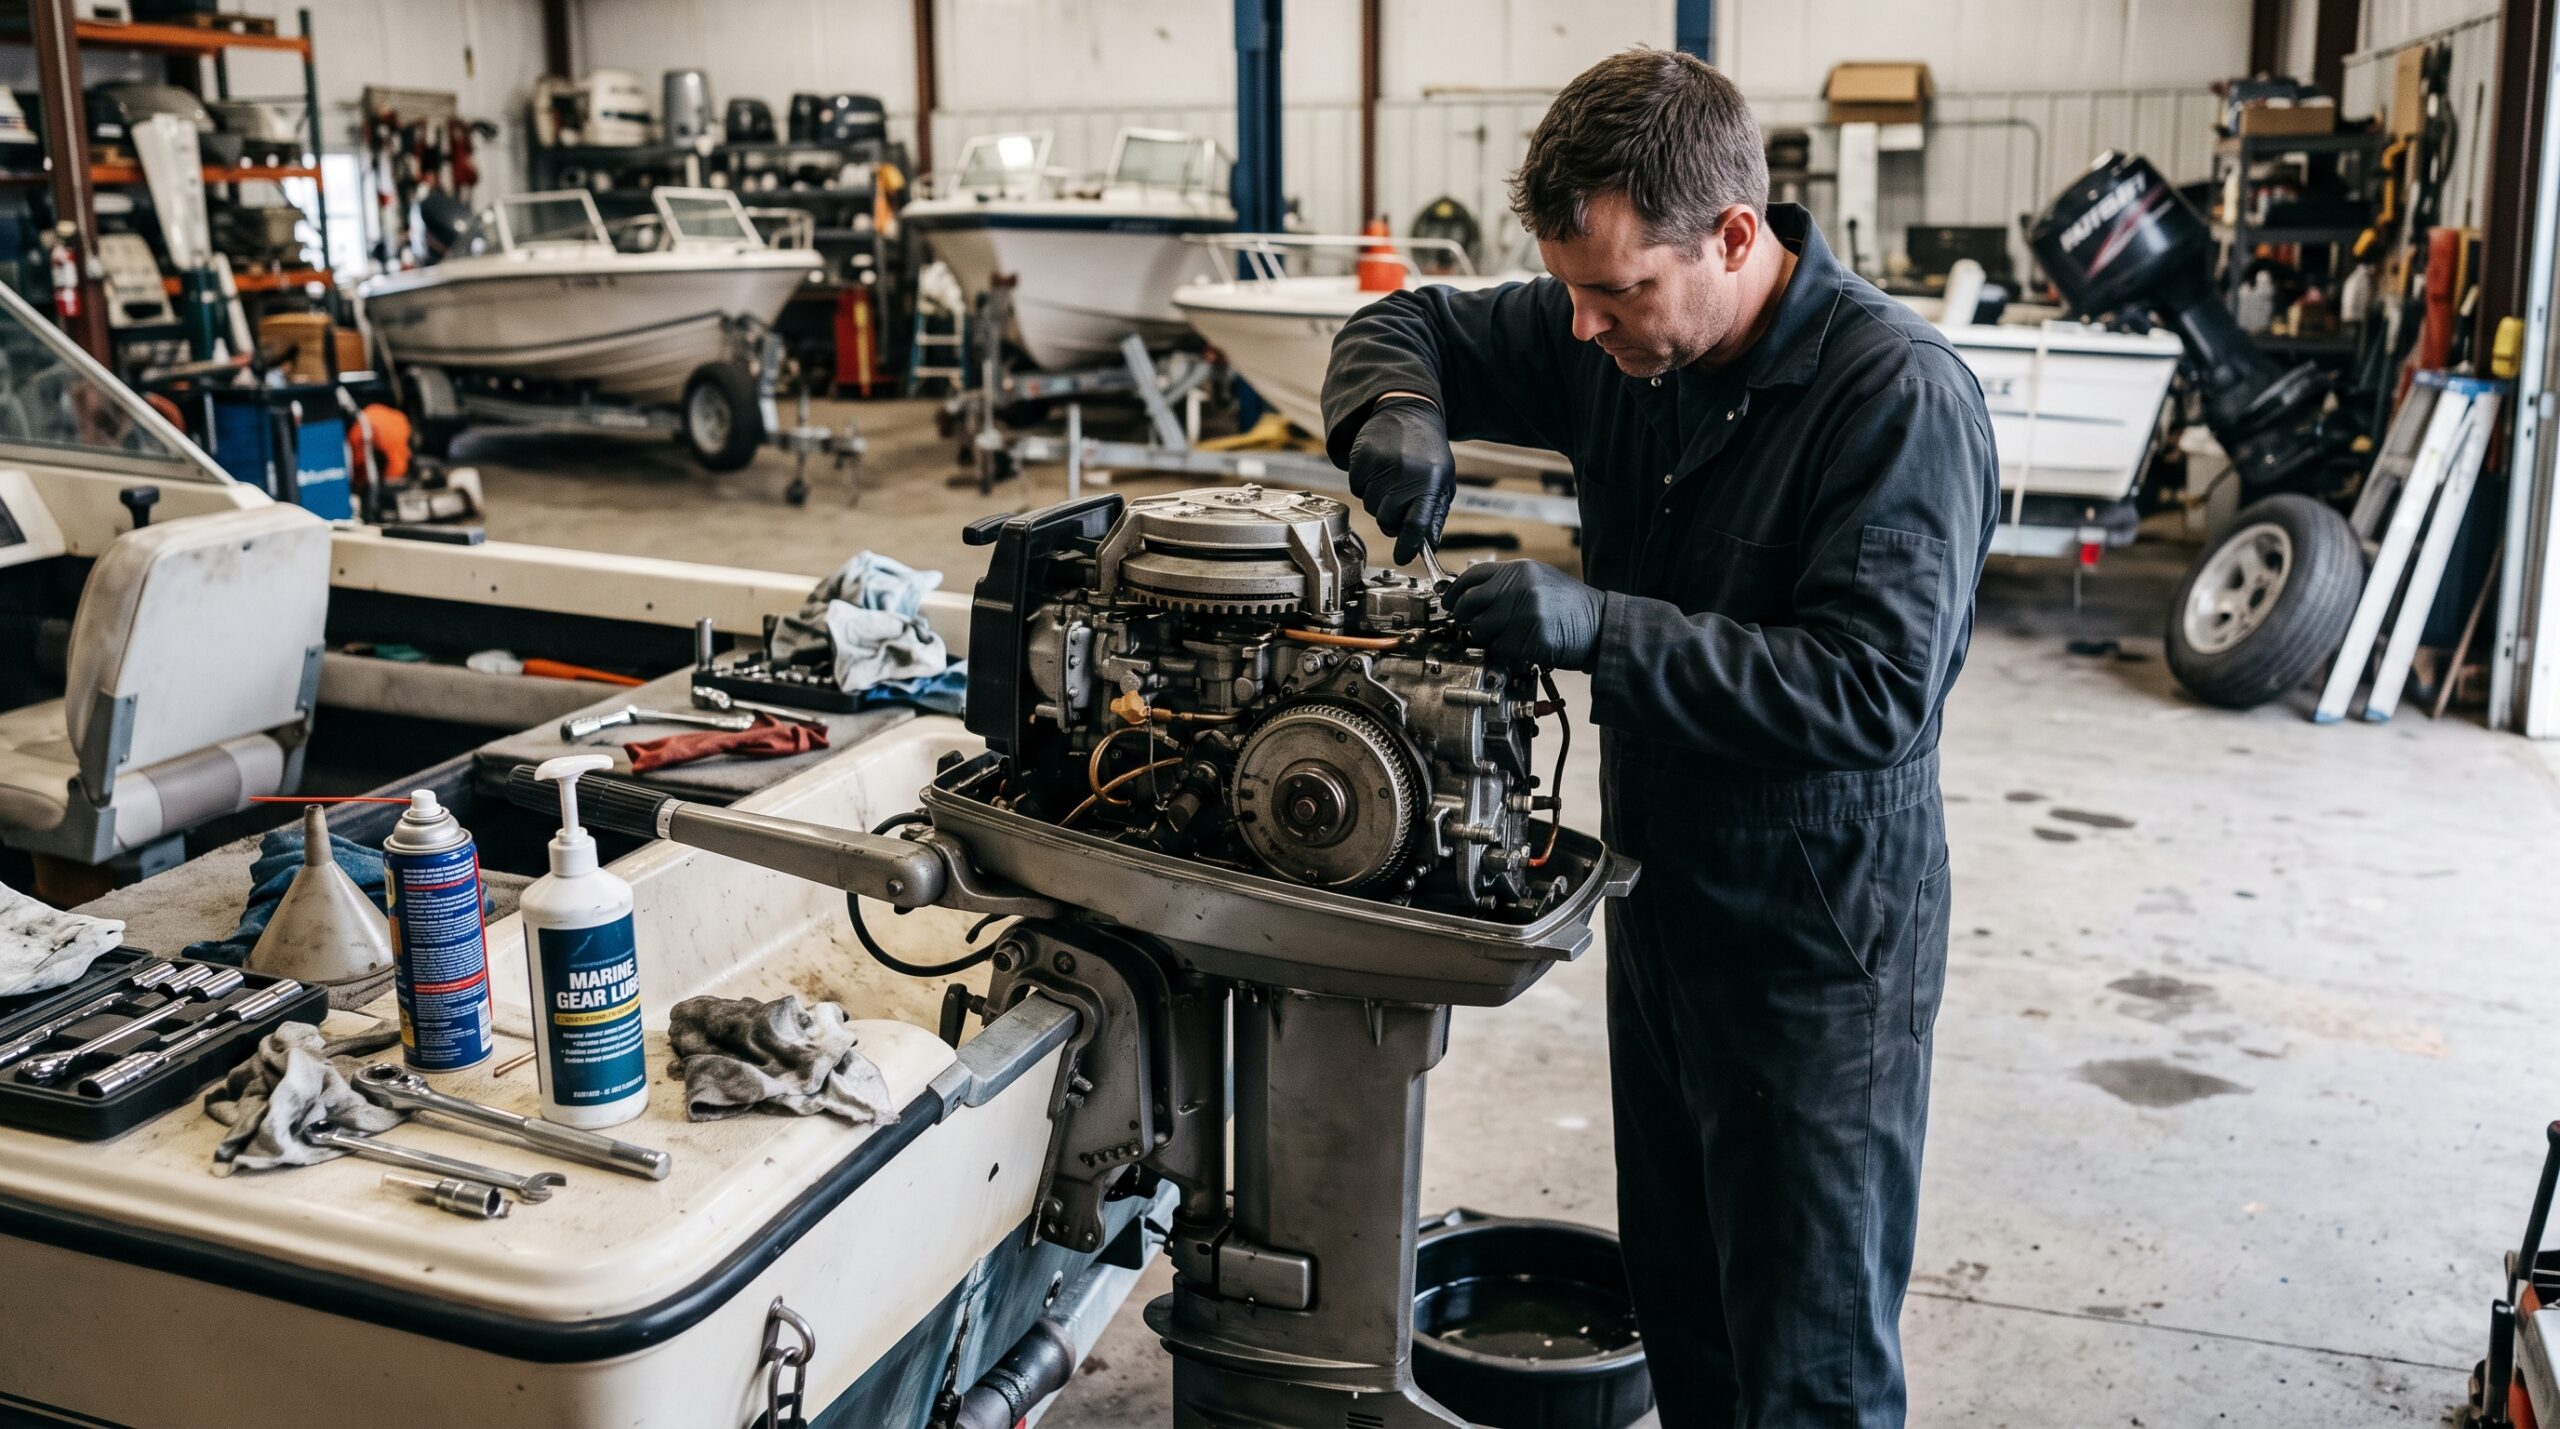
If you own a boat with a two-stroke outboard engine, proper winter storage can help protect it from corrosion, fuel problems, and costly repairs. Even if your area does not have freezing temperatures, storing your motor for several months without proper care can cause trouble when boating season returns.
Learning how to winterize a 2 stroke outboard motor means preparing the fuel system, protecting internal engine parts, checking the lower unit, and storing the motor in the right position. The exact process depends on your engine’s make, model, fuel system, and storage conditions.
Some two-stroke engines use carburetors, while others use oil injection. Some require fogging oil, but others have specific procedures that should be followed instead. Always check the owner’s manual before starting maintenance.
This guide explains each step in simple terms. You will learn what supplies you need, how to protect your engine, which mistakes to avoid, and how to prepare the motor for spring.
Why Should You Winterize a 2-Stroke Outboard Motor?
Winterization is the process of preparing an engine for a period of reduced or no use. It helps protect important parts while the motor sits in storage.
A two-stroke outboard engine relies on a proper fuel mixture or oil-injection system, clean fuel passages, good lubrication, and an effective cooling system. Problems can develop when fuel ages, moisture remains in the wrong places, or metal parts are exposed to a damp environment.
Even in a mild climate, seasonal storage maintenance is useful if you will not run the motor for several weeks or months.
Prevent Fuel System Problems
Fuel can change during storage. Gasoline may oxidize, form deposits, or lose some of its useful properties over time. These changes can affect carburetor jets, fuel passages, filters, and injectors where fitted.
Old fuel can make an engine difficult to start. In some cases, the motor may idle poorly or fail to run smoothly.
The best approach depends on your fuel system. Use fresh fuel and an approved marine fuel stabilizer when recommended. Follow the product label and the engine manufacturer’s storage instructions.
Protect Internal Engine Parts From Corrosion
Moisture and salty air can affect metal surfaces inside and outside an outboard motor. Corrosion may develop on exposed fasteners, electrical connections, and other vulnerable parts.
A suitable marine corrosion protector can help shield external metal surfaces. Fogging oil may also protect certain internal engine surfaces when the manufacturer recommends it.
Do not assume that one spray product protects every engine part. Use each product only for its intended purpose.
Reduce the Risk of Cold-Weather Damage
Water left in areas that are not designed to retain it can freeze and expand. This may damage components if temperatures fall below freezing.
Follow the manual’s draining and storage instructions. Keep the motor in the manufacturer’s recommended position so water can drain as intended.
In warmer climates, the same process still helps remove trapped water and prepare the engine for long-term storage.
Make Spring Startup Easier
A properly stored outboard is easier to inspect before the next boating season.
Fuel system checks, fresh gear lubricant when needed, clean electrical connections, and a visual inspection can help identify problems before launching the boat.
Winterization does not guarantee a trouble-free startup, but it reduces avoidable risks and gives you a chance to catch maintenance issues early.
What You Need to Winterize a 2-Stroke Outboard Motor
Before beginning, collect the correct supplies for your engine. The required items vary by manufacturer and model.
Essential Tools and Supplies
You may need:
-
The engine owner’s manual
-
Fresh water and the correct flushing attachment
-
Marine fuel stabilizer, if recommended
-
Fresh gasoline that meets the manufacturer’s requirements
-
The correct two-stroke oil or oil-injection lubricant
-
Manufacturer-approved fogging oil, if required
-
The specified lower-unit gear lubricant
-
A suitable gear-oil pump and compatible fittings
-
Wrenches and screwdrivers
-
A spark-plug socket and torque wrench, if plug service is required
-
Marine grease for specified lubrication points
-
Clean rags and an oil-drain container
-
A suitable propeller wrench and replacement hardware, if needed
Do not buy gear lubricant based on appearance alone. Check the viscosity and specification listed in the manual.
Safety Gear and Cleaning Materials
Wear safety glasses and fuel-resistant gloves when handling gasoline, lubricant, or cleaning products.
Keep a suitable fire extinguisher nearby when working around fuel. Work outdoors or in a properly ventilated area, away from flames, cigarettes, heaters, and sparks.
You should also have absorbent pads or a tray to catch spills. Dispose of used oil and contaminated materials according to local requirements.
Never run an outboard in an enclosed room, garage, or other poorly ventilated space. Exhaust gases can be deadly.
Choosing the Right Marine Products
Choose products designed for marine engines and approved for your motor.
Pay special attention to these items:
-
Fuel stabilizer: Must be compatible with your gasoline and engine.
-
Two-stroke oil: Must meet the engine’s specified requirements.
-
Fogging oil: Use only if the manufacturer’s storage procedure calls for it.
-
Gear lubricant: Must match the lower-unit specification.
-
Marine grease: Use on the points listed in the service manual.
Using the wrong product can cause damage or reduce protection. When in doubt, confirm the product specification with the engine manufacturer or a qualified marine mechanic.
How to winterize a 2 stroke outboard motor Step by Step
The following steps provide a general guide for seasonal storage. Your owner’s manual takes priority, especially for fuel-system preparation, fogging, water drainage, and storage position.
Step 1: Check the Owner’s Manual
Start by identifying the engine’s make, model, horsepower, and year. Find the section on seasonal storage or winterization.
Check whether your motor has a carburetor, direct fuel injection, or another fuel system. Confirm whether it uses premixed fuel or a separate oil-injection system.
The manual should explain:
-
Which fuel stabilizer, if any, to use
-
Whether the fuel system should remain full, be drained, or follow another procedure
-
Whether fogging oil is required
-
How to flush and drain the cooling system
-
Which gear lubricant and grease to use
-
How to position the motor during storage
If the motor has special electronic controls or a model-specific storage procedure, follow those instructions rather than a generic guide.
Step 2: Flush the Engine With Fresh Water
Flushing removes salt, dirt, and other deposits from the cooling passages. It is particularly important if you use the boat in salt water or in water containing sediment.
Follow the manufacturer’s flushing instructions.
-
Place the boat or motor in the approved position for flushing.
-
Connect the correct flushing attachment or water supply.
-
Turn on the water if the procedure requires it.
-
Start the engine only if the manual specifically permits running it during flushing.
-
Keep the water supply at the required flow.
-
Watch for the cooling-water indicator, if fitted.
-
Stop the engine and water supply in the order specified by the manufacturer.
Never run the engine without the required cooling-water supply. The water pump can be damaged quickly.
Some engines support flushing with the engine stopped. Others require a particular attachment or procedure. Do not assume every outboard can be flushed the same way.
After flushing, allow the water to drain according to the manual. If you used the motor in salt water, inspect the exterior for salt deposits and rinse it as directed.
Step 3: Inspect and Stabilize the Fuel System
Fuel preparation is one of the most important parts of winterization.
Start by inspecting the fuel tank, hoses, connections, primer bulb, and filter where accessible. Look for cracks, leaks, loose fittings, or signs of deterioration.
Next, determine how your engine should be stored.
For an engine that will retain gasoline during storage, use an approved marine fuel stabilizer if the manufacturer recommends it. Add the correct amount for the volume of fuel in the tank, following the label. The product may need fresh fuel and adequate mixing to work properly.
Some manufacturers recommend running the engine according to a specific procedure so treated fuel reaches the fuel system. Do this only when the manual permits it and the engine has a proper cooling-water supply.
Other engines may require draining the carburetor or following a different fuel-storage method. Do not apply one method to every model.
If you use premixed fuel, maintain the specified gasoline-to-oil ratio. If your engine uses oil injection, follow its separate lubrication instructions.
Never pour stabilizer or extra two-stroke oil into the fuel system without confirming that the product and amount are appropriate.
Step 4: Treat the Engine With Fogging Oil if Required
Fogging oil is designed to leave a protective film on certain internal engine surfaces during storage. This may help reduce corrosion when the engine sits unused for an extended period.
However, not every two-stroke outboard uses the same fogging method.
Some models require fogging through designated intake points. Others use a specific procedure involving the cylinders or another approved method. Certain fuel-injected engines have procedures that differ from those used on traditional carbureted engines.
To use fogging oil safely:
-
Check the manufacturer’s winterization instructions.
-
Confirm that the product is approved for your engine.
-
Identify the specified application point.
-
Follow the exact application and engine-shutdown procedure.
-
Avoid spraying into electrical components, sensors, or other areas not approved for treatment.
Do not spray fogging oil into an engine simply because a general video recommends it. An incorrect procedure can cause operating problems or damage components.
If the manual calls for fogging through the spark-plug openings, follow its directions for plug removal, product application, and any required turning of the engine. Use the specified amount rather than guessing.
Step 5: Inspect the Spark Plugs
Spark plugs help ignite the air-fuel mixture inside the cylinders. Their condition can provide useful information about engine operation.
Inspect the plugs if your maintenance schedule calls for it.
Look for:
-
Heavy carbon deposits
-
Cracks or damaged ceramic insulation
-
Worn electrodes
-
Unusual deposits
-
Signs of overheating or possible water contamination
A small amount of normal discoloration is not necessarily a problem. However, unusual deposits or damage may indicate that the engine needs further inspection.
Clean or replace the plugs according to the manufacturer’s recommendations. Use the correct plug type and specified gap.
If you remove the plugs, keep dirt out of the openings. Reinstall them with the specified torque when required.
Do not use an arbitrary tightening force. Overtightening can damage cylinder-head threads, while loose plugs can cause other problems.
Step 6: Change the Lower Unit Gear Oil
The lower unit contains gears and bearings that transfer power to the propeller. Its lubricant helps reduce friction and protect these components.
Changing the gear oil before storage can reveal possible problems and ensure the unit has suitable lubricant for the off-season.
Place a suitable drain pan under the lower unit. Follow the manufacturer’s procedure for removing the lubricant plugs and draining the oil.
Inspect the old lubricant for unusual color, debris, or a milky appearance. A milky appearance can indicate water contamination, although the exact cause requires inspection.
Check the drain-plug magnetic tip, if fitted, for metal particles. A small amount of fine material may be normal on some units, but larger pieces or excessive debris deserve attention.
Refill the unit with the specified marine gear lubricant using the correct pump and filling procedure. Many lower units are filled from the bottom until lubricant reaches the upper level opening, but you should confirm this in your manual.
Replace the specified sealing washers or gaskets as required. Tighten the plugs to the recommended torque.
If the oil looks milky, contains significant metal debris, or shows other concerning signs, have the lower unit inspected before storage or further operation.
Step 7: Inspect the Propeller and Propeller Shaft
The propeller can hide fishing line, weeds, and other debris around the shaft. Fishing line is especially important to check because it can damage the propeller-shaft seal.
With the engine stopped and secured, follow the manual’s procedure for removing the propeller if inspection requires it.
Check for:
-
Fishing line wrapped around the shaft
-
Bent or chipped propeller blades
-
Corrosion
-
Damaged hardware
-
Signs of lubricant leakage around the propeller shaft
Remove debris carefully without damaging the seal. Inspect the shaft and surrounding area.
Apply the specified marine grease to the approved shaft surface before reinstalling the propeller, if the manufacturer recommends it. Use the correct thrust washer, spacers, nut, and locking hardware.
Secure the propeller using the specified procedure and torque. Replace damaged hardware rather than reusing it.
If you find fishing line behind the propeller or signs of leakage, consider having the shaft seal inspected by a marine mechanic.
Step 8: Grease Required Lubrication Points
Some outboard motors have grease fittings or moving parts that require periodic lubrication.
Common locations may include steering components, tilt mechanisms, swivel brackets, and other points identified in the service manual.
Clean each fitting before applying grease. This helps prevent dirt from entering the component.
Use the specified marine grease and apply only the amount required. Excess grease can attract dirt or escape around seals.
Do not grease electrical connectors, rubber components, or sealed parts unless the manufacturer specifically instructs you to do so.
Also inspect the steering system for stiffness, excessive play, or visible corrosion. These issues may need repair before the next boating season.
Step 9: Drain Water and Check for Leaks
Water management is essential when preparing an outboard for storage, especially where freezing temperatures are possible.
Follow the manual’s instructions for draining the cooling system. Keep the engine in the required position so water can leave the passages.
Do not assume that tilting the engine fully up or down is correct for every model. Some motors need a particular storage position to drain properly.
Inspect the motor for:
-
Fuel leaks
-
Oil leaks
-
Gear lubricant leaks
-
Damaged hoses
-
Loose clamps
-
Corrosion around fittings
-
Cracks in visible components
If the engine has a built-in fuel filter or water-separating filter, service it according to the manual.
Address any fuel leak before storage. Gasoline vapors can create a serious fire risk, even when the engine is not running.
If water contamination or a damaged seal is suspected, have the problem checked instead of assuming it will resolve during storage.
Step 10: Clean and Store the Outboard Motor Properly
Clean the engine exterior with suitable products and fresh water where appropriate. Remove salt, dirt, and debris without directing high-pressure water at seals, electrical parts, or sensitive components.
Dry accessible surfaces and apply an approved marine corrosion protector where specified. Avoid coating belts, friction surfaces, or other parts that must remain free of lubricant.
Secure loose fuel hoses, protect exposed connections as directed, and keep the motor away from standing water.
Store the outboard in the manufacturer’s recommended position. If it remains mounted on the boat, ensure it is supported securely and can drain correctly.
If the motor is removed, use a suitable stand or storage rack designed to support its weight. Do not leave it balanced on an unstable surface.
A clean, dry, well-ventilated storage area is usually the best choice.
How to winterize a 2 stroke outboard motor With a Carburetor
Carbureted two-stroke engines need particular attention because small fuel passages can become restricted by deposits.
A carburetor mixes fuel and air before the mixture enters the engine. Its narrow passages and jets may be affected by fuel left for a long period.
Protect the Carburetor From Fuel Deposits
Start by identifying the fuel-storage method recommended for your model.
Depending on the design, the manufacturer may recommend draining the carburetor bowl, using stabilized fuel, or following a specific procedure that protects the entire fuel system.
If the manual calls for draining the carburetor, use the designated drain point and collect the fuel in an approved container. Never drain gasoline onto the ground, into the water, or into a household drain.
If the instructions call for running treated fuel through the carburetor, follow the specified method with adequate cooling water and ventilation.
Do not remove the carburetor unnecessarily. If deposits have already formed or the engine has been running poorly, professional cleaning may be needed.
Follow the Manufacturer’s Fuel Storage Instructions
Fuel storage recommendations vary according to the engine, fuel type, and expected storage period.
For some engines, draining the carburetor is recommended. For others, a different approach is specified.
Avoid combining methods without guidance. For example, adding stabilizer does not automatically mean every carburetor should be left full of fuel.
Use fresh fuel before storage when required, and follow the stabilizer’s instructions. If your fuel contains ethanol, pay particular attention to the manufacturer’s guidance on fuel quality, moisture, and storage.
Check Fuel Lines and Connections
Inspect all accessible hoses, clamps, connectors, and the primer bulb.
Look for hardened rubber, cracks, swelling, loose connections, or fuel stains. Check the fuel tank cap and vent system for visible damage.
Replace parts that do not meet the manufacturer’s requirements. Use fuel-system components designed for marine service and compatible with the fuel you use.
If you notice persistent fuel odors or leakage, do not start the motor until the problem has been corrected.
How to winterize a 2 stroke outboard motor With Oil Injection
An oil-injected two-stroke outboard has a separate oil supply that delivers lubricant to the engine. This system differs from an engine that uses gasoline mixed with two-stroke oil.
When preparing an oil-injected motor for storage, follow the manufacturer’s procedure. Do not assume that the oil tank should be emptied or that extra oil should be added to the fuel.
Check the Oil Injection System
Inspect the oil tank, cap, visible hoses, and connections.
Look for leaks, damaged lines, loose fittings, or signs of contamination. If your motor has warning indicators for oil level or oil delivery, check for any recorded warnings before storage.
Do not disconnect oil lines or adjust the pump unless the service procedure calls for it. An incorrect adjustment can affect lubrication when the engine is used again.
Inspect the Oil Tank and Lines
Make sure the oil tank is secure and the cap fits correctly. Check the hoses for cracks, hardening, or signs of leakage.
Use the oil type specified for your engine. Some systems require a particular two-stroke oil specification, and the wrong product may not provide the intended protection.
If the system has a known fault, repair it before the next outing. Never assume that a full oil tank proves oil is reaching the engine.
Follow the Manufacturer’s Storage Procedure
Some oil-injected engines have specific instructions for fuel treatment, oil storage, and fogging.
Follow those instructions in the correct order. Do not add premix to the gasoline tank as a substitute for a working oil-injection system unless the manufacturer explicitly specifies a temporary procedure.
If you are unsure whether your model needs fogging oil, consult the manual or a qualified mechanic.
Should You Remove the Outboard Motor for Winter Storage?
You do not always need to remove an outboard for winter storage. The right choice depends on the motor’s size, the boat’s storage conditions, and the manufacturer’s recommendations.
Storing the Motor on the Boat
Keeping the motor mounted can be convenient if the boat is stored securely.
Before leaving it in place, complete the required maintenance and confirm that the motor is in the recommended storage position. Ensure it can drain correctly and that the mounting hardware is secure.
Use a suitable boat cover that allows ventilation. A cover that traps condensation can create a damp environment.
If the boat remains outdoors, inspect the cover and supports regularly, especially after heavy rain or strong winds.
Removing the Motor for Indoor Storage
Removing the outboard may make sense if you have access to a dry, secure indoor space.
However, outboards can be heavy and awkward to handle. Larger engines may require lifting equipment and trained assistance.
Before removal, follow the service manual and disconnect the battery, fuel supply, control cables, and other connections as specified.
Do not lift the motor by an unapproved point. Use the manufacturer’s designated lifting eyes and equipment rated for the engine’s weight.
Choosing a Safe Storage Position
Store the motor in the orientation recommended by its manufacturer.
Many outboards have specific requirements for vertical storage, while certain smaller models may support other positions. An incorrect angle can allow oil or water to collect in areas where it should not remain.
Use a stable motor stand that supports the engine securely. Keep the propeller away from walkways and protect the motor from accidental impact.
Common Winterization Mistakes to Avoid
Even a careful owner can miss an important maintenance step. Avoid these common mistakes when preparing your outboard for storage.
Leaving Untreated Fuel in the System
Gasoline left for months may deteriorate and form deposits. These deposits can affect fuel passages and make starting more difficult.
Use the manufacturer’s recommended storage method. This may involve stabilized fuel, draining certain parts of the system, or another model-specific procedure.
Do not assume a fuel stabilizer can restore old, badly degraded gasoline.
Skipping Lower Unit Gear Oil Inspection
Old gear oil may contain water, metal particles, or other signs of wear.
Inspect the lubricant and change it according to the maintenance schedule. If contamination is present, investigate the cause before returning the engine to service.
Replacing the oil without checking for abnormal signs may hide a problem rather than solve it.
Using the Wrong Fogging Procedure
Fogging oil can help protect some engines, but incorrect application may cause problems.
Never assume that a procedure designed for one two-stroke model is safe for another. Follow the exact instructions for your engine type.
Storing the Motor With Water Inside
Water left in the wrong places can freeze and damage components in cold weather. It may also contribute to corrosion.
Drain the engine as directed and store it in the correct position. Do not rely on guesswork or assume that all water has drained simply because the motor has been tilted.
Ignoring Manufacturer Maintenance Instructions
Generic guides cannot cover every outboard design.
Ignoring model-specific instructions can lead to improper lubrication, incorrect fuel preparation, or damage during maintenance.
Keep a record of completed work, including lubricant changes, replaced parts, and any problems that need attention.
How to Store a 2-Stroke Outboard Motor During Winter
Once maintenance is complete, choose a storage area that protects the engine from moisture, dirt, and accidental damage.
Indoor vs. Outdoor Storage
Indoor storage is generally preferable when the space is dry, secure, and well ventilated.
A garage or marine storage building can protect the motor from direct rain, snow, sunlight, and blowing debris. However, never run the engine in an enclosed space because exhaust gases can accumulate.
Outdoor storage may be possible if indoor space is unavailable. Use a suitable cover that sheds water while allowing ventilation.
Avoid wrapping the motor so tightly that condensation becomes trapped. Secure the cover so wind cannot pull it loose.
Protecting the Motor From Moisture and Dust
Keep the motor away from standing water and damp floors. A suitable stand can help keep it stable and make inspection easier.
Use only manufacturer-approved protective covers for air intakes, exhaust openings, or other exposed areas. Mark any temporary covers so they are removed before the engine is operated again.
Do not seal openings that need to remain clear for drainage or ventilation.
Protect exposed metal surfaces with a suitable marine corrosion inhibitor. Keep electrical connections clean and treat them only with products approved for those connections.
Checking the Engine During Long-Term Storage
If the motor will remain unused for several months, inspect the storage area periodically.
Check for moisture, cover damage, fuel odors, signs of leakage, and visible corrosion. Keep rodents and pests away from fuel lines and wiring.
Do not start the motor occasionally just to keep it active unless the manufacturer recommends a specific maintenance routine. Starting an outboard without the correct cooling-water supply can damage the water pump, and running it in an enclosed space is dangerous.
If you discover a leak or other defect, address it before spring.
How Much Does It Cost to Winterize a 2-Stroke Outboard Motor?
The cost depends on the engine’s size, condition, location, and required maintenance. A small portable outboard may need only basic supplies, while a larger engine may require additional labor and parts.
DIY Winterization Costs
If you already own the necessary tools, doing the work yourself may cost less than hiring a marine mechanic.
Typical expenses may include:
-
Fuel stabilizer, if required
-
Fogging oil, if specified
-
Lower-unit gear lubricant
-
Marine grease and corrosion protector
-
Replacement spark plugs or sealing washers, if needed
-
Cleaning supplies and a flushing attachment, if you do not already have one
For example, if your motor needs only fuel treatment, a gear-oil change, and basic cleaning, your bill will be lower than if it also needs plugs, filters, and replacement hoses.
These are categories of possible expenses, not a fixed price estimate. Actual costs depend on local availability and the engine model.
Professional Marine Mechanic Costs
A marine mechanic may charge for labor, supplies, inspection, and any replacement parts.
Professional service can be useful for larger outboards, unfamiliar fuel systems, suspected gearcase leaks, or engines with electronic controls.
Ask whether the quoted service includes fuel-system preparation, fogging where required, gear-oil replacement, propeller inspection, and a general condition check.
Request an itemized estimate so you can compare services fairly.
Factors That Affect the Total Cost
The main cost factors include:
-
Engine horsepower and design
-
Carburetor versus fuel-injection system
-
Condition of the fuel hoses and tank
-
Whether the lower-unit oil needs replacement
-
Required parts and lubricants
-
Local labor rates
-
Whether the motor needs repairs before storage
A well-maintained engine will often need less work than one with old fuel, corroded fittings, or a history of poor maintenance.
How to Prepare Your 2-Stroke Outboard Motor for Spring
Winterization is only half the process. Before using the boat again, inspect the motor and confirm that all maintenance tasks have been completed.
Inspect Fuel, Oil, and Gear Lubricant
Check the fuel tank and lines for leaks or deterioration. Replace fuel that no longer meets the manufacturer’s requirements.
For a premix engine, prepare gasoline and two-stroke oil at the specified ratio. For an oil-injected engine, verify the oil supply and inspect the system according to the manual.
Check the lower unit for signs of leakage. If the gear lubricant was changed before storage, confirm that the plugs remain secure and that no new leak is visible.
Do not mix different lubricant types unless the manufacturer permits it.
Check the Battery and Electrical Connections if Equipped
Some outboards have electric starters, trim systems, or other electrical equipment.
If your motor uses a battery, inspect its condition and charge it according to the battery manufacturer’s instructions. Check terminals and visible wiring for corrosion or damage.
Reconnect the battery using the correct procedure. Confirm that the connections are secure and that the wiring is not cracked or worn.
Do not operate electrical equipment around leaking fuel or gasoline vapors.
Inspect Cooling Water Flow
Before the first start, inspect the cooling-water intake and the visible condition of the water-pump indicator, if fitted.
Remove any debris that blocks the intake. Check the water pump and impeller according to the maintenance schedule, especially if the motor has been stored for a long period.
When starting the engine, provide the correct cooling-water supply and follow the manual. Watch for the expected cooling-water discharge and warning indicators.
If the engine overheats or cooling-water flow is absent or abnormal, shut it down promptly and investigate the cause.
Test the Engine Safely Before Returning to the Water
Complete the manufacturer’s pre-operation checklist.
Confirm that the fuel system is secure, the propeller is correctly installed, the controls work properly, and the engine is mounted securely.
If testing on land, use only the approved flushing setup and procedure. Never run the engine in a confined area or place yourself near a rotating propeller.
Do not shift gears or run the engine at high speed on land unless the manufacturer’s procedure specifically allows the test.
If the motor starts poorly, makes unusual noises, leaks fluid, or shows warning indicators, stop and diagnose the problem before taking the boat out.
A short, careful inspection now can help prevent an unexpected problem on the water.
Frequently Asked Questions
Do You Need to Winterize a 2-Stroke Outboard Motor?
Yes, if the motor will sit unused for an extended period, seasonal preparation is a good idea. It helps protect the fuel system, internal engine parts, lower unit, and external metal surfaces.
The level of maintenance depends on storage length, climate, and manufacturer instructions. Even in warm regions, proper storage helps reduce fuel-related problems and corrosion.
Can You Leave Gas in a 2-Stroke Outboard Motor Over Winter?
It depends on the engine and its fuel system. Some manufacturers recommend storing the engine with properly treated fuel, while others specify draining the carburetor or using another procedure.
Use fresh gasoline and an approved stabilizer when recommended. Follow the stabilizer label and your owner’s manual.
Never leave fuel untreated for a long storage period without checking the manufacturer’s guidance.
Do You Need Fogging Oil for a 2-Stroke Outboard?
Not always. Some two-stroke outboards require fogging oil, while others have specific storage procedures that differ.
Check the manual before applying it. Using the wrong method or applying the product in an unapproved location may cause problems.
Should You Change the Gear Oil Before Winter Storage?
Changing the lower-unit gear oil before storage is often a useful maintenance practice, particularly if the service schedule calls for it.
Inspect the old oil for a milky appearance, unusual debris, or excessive metal particles. These signs may indicate water intrusion or internal wear.
Use the specified marine gear lubricant and investigate unusual contamination rather than simply replacing the oil and ignoring the cause.
Can You Store a 2-Stroke Outboard Motor Outside?
Yes, some outboards can be stored outdoors if they are prepared correctly and protected from weather.
Use a suitable cover that sheds water but allows ventilation. Follow the manufacturer’s storage-position instructions, protect exposed metal parts, and make sure water can drain.
Indoor storage in a dry, secure area is generally preferable when available.
How Long Does It Take to Winterize a 2-Stroke Outboard Motor?
A basic service on a small, well-maintained motor may take around one to two hours. Larger engines or motors needing extra maintenance can take longer.
Allow additional time if you need to change gear oil, inspect the propeller shaft, replace spark plugs, or address fuel-system problems.
The time required also depends on your experience and the manufacturer’s procedure.
Can You Winterize a 2-Stroke Outboard Motor Yourself?
Yes, many boat owners can complete routine winterization if they have the correct tools, understand the engine, and follow the service manual.
Basic tasks may include flushing, visual inspections, fuel preparation, cleaning, and approved lubrication.

If you are unsure about fogging, fuel-system servicing, gearcase contamination, or oil-injection maintenance, ask a qualified marine mechanic for help.
Conclusion
Knowing how to winterize a 2 stroke outboard motor helps you prepare your engine for months of storage and reduce the risk of avoidable repairs.
Start by checking the owner’s manual. Flush the engine correctly, prepare the fuel system, use fogging oil only when required, inspect the spark plugs, change the lower-unit gear oil when due, and check the propeller shaft and lubrication points. Drain water as directed and store the motor in a clean, dry, secure location.
Remember that carbureted and oil-injected engines may need different procedures. Never guess when it comes to fuel preparation, lubrication, or fogging.
With careful maintenance and the correct storage method, you can help protect your two-stroke outboard and make it easier to prepare for the next boating season.